Features
Prompt Library
Prompt Library offers a central hub to store, organize, and share prompts across the team.
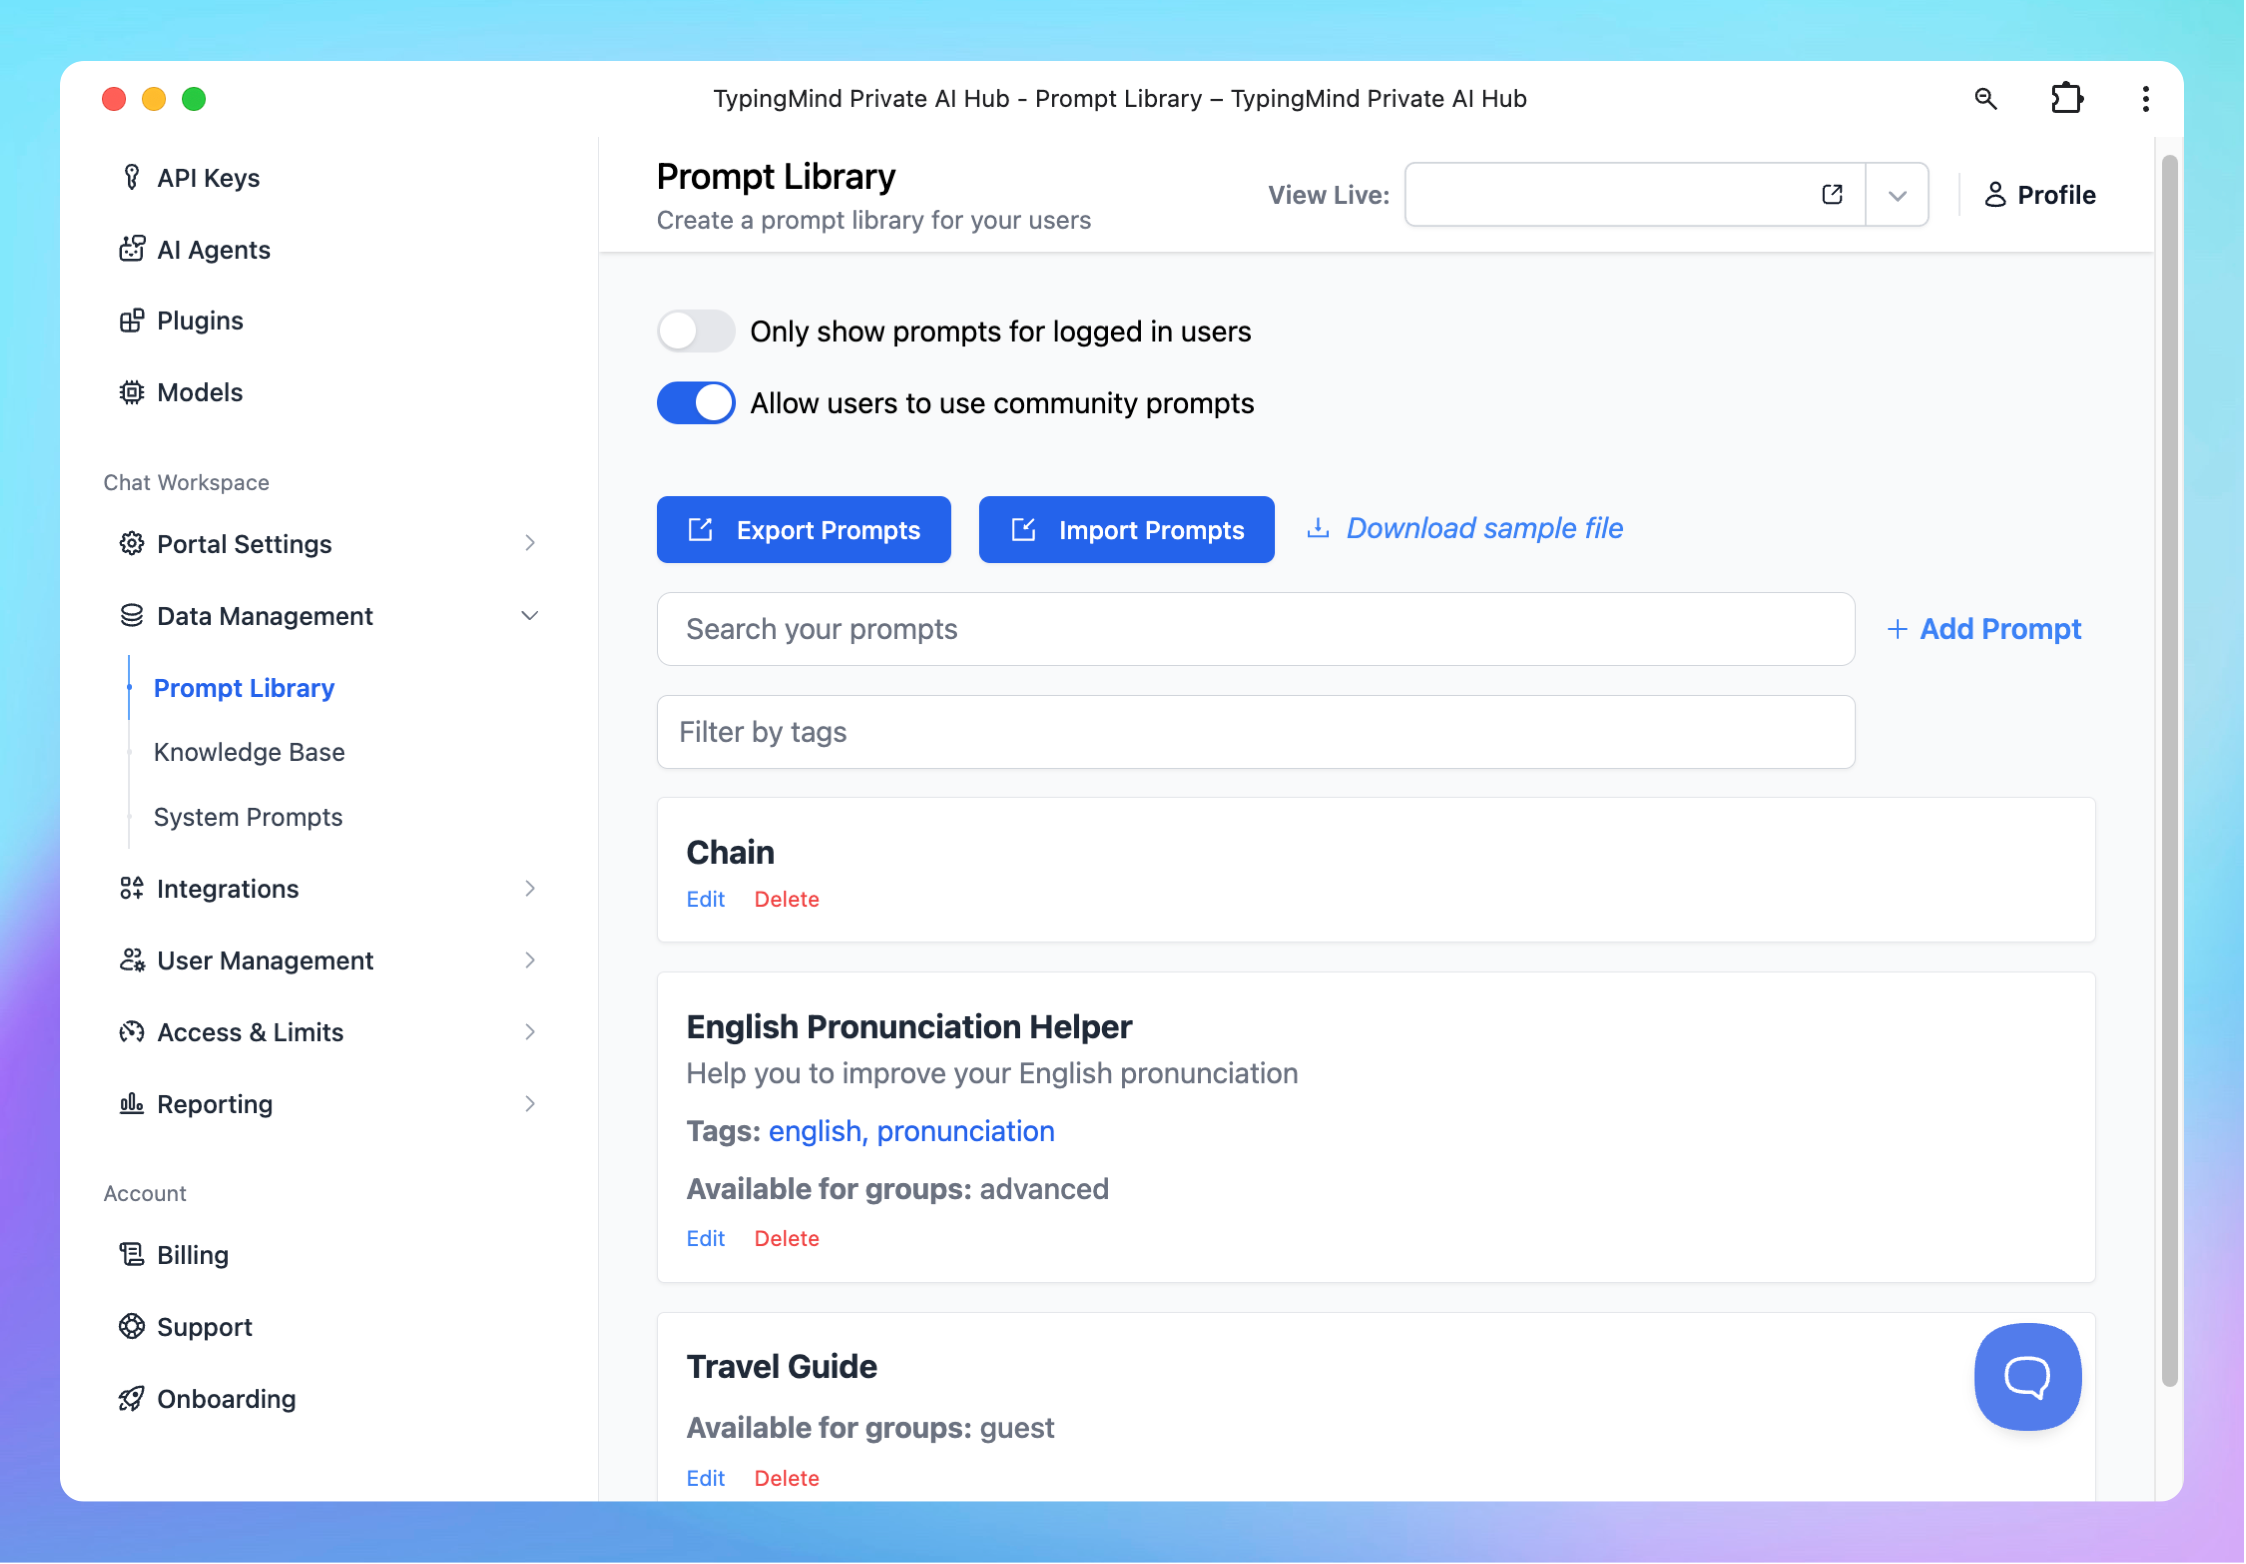
With TypingMind, you can easily access prompts within workflows to speed up development and creative tasks for your team.
Why build your prompt library on TypingMind?
TypingMind offers a flexible option to create your own prompt library where you can:
- Create exclusive built-in prompts for your team members so they can quickly access the resources without manually creating them from the chat interface.
- Control which groups of users can use the prompts
Step by step to build prompt library on TypingMind
1. Build your Prompt Library
- Go to Prompts Library
- Click “Add Prompt”
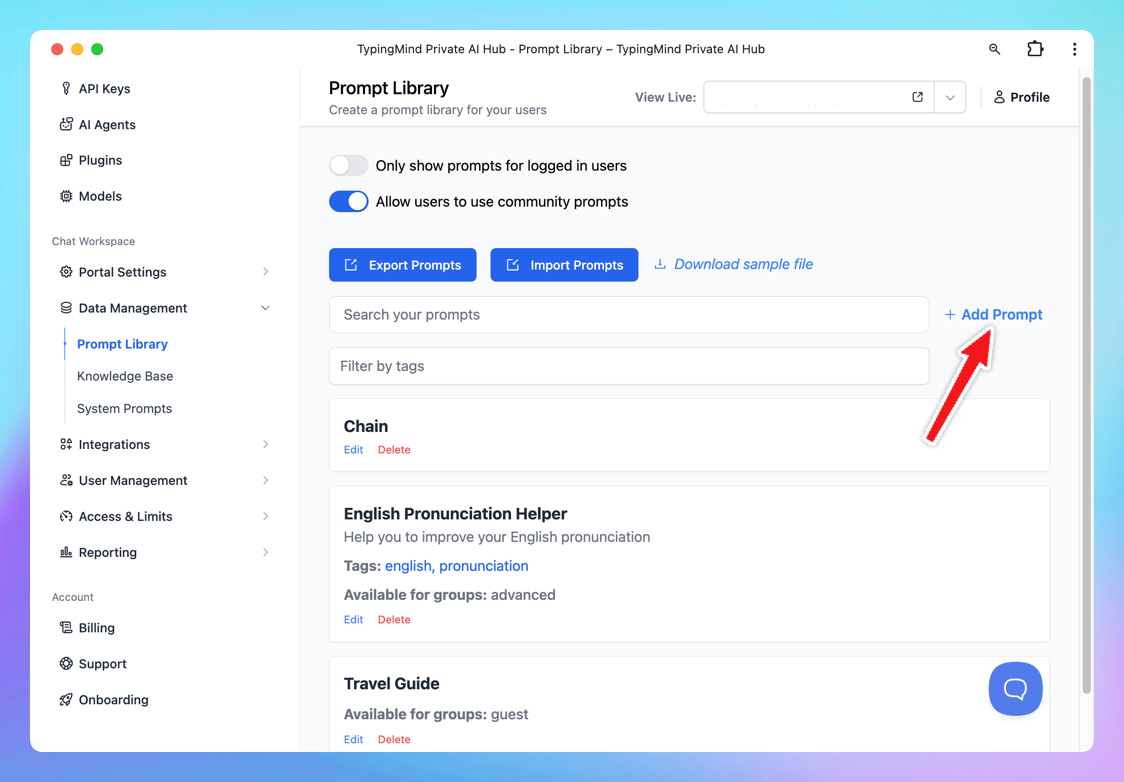
Your created prompts will be displayed on the end-user interface as follows:

2. Control user access to certain prompts
User access will be controlled using User Groups. Each user can be added to a group, and you can use these user groups to set access permissions for each prompt.
Here’s how:
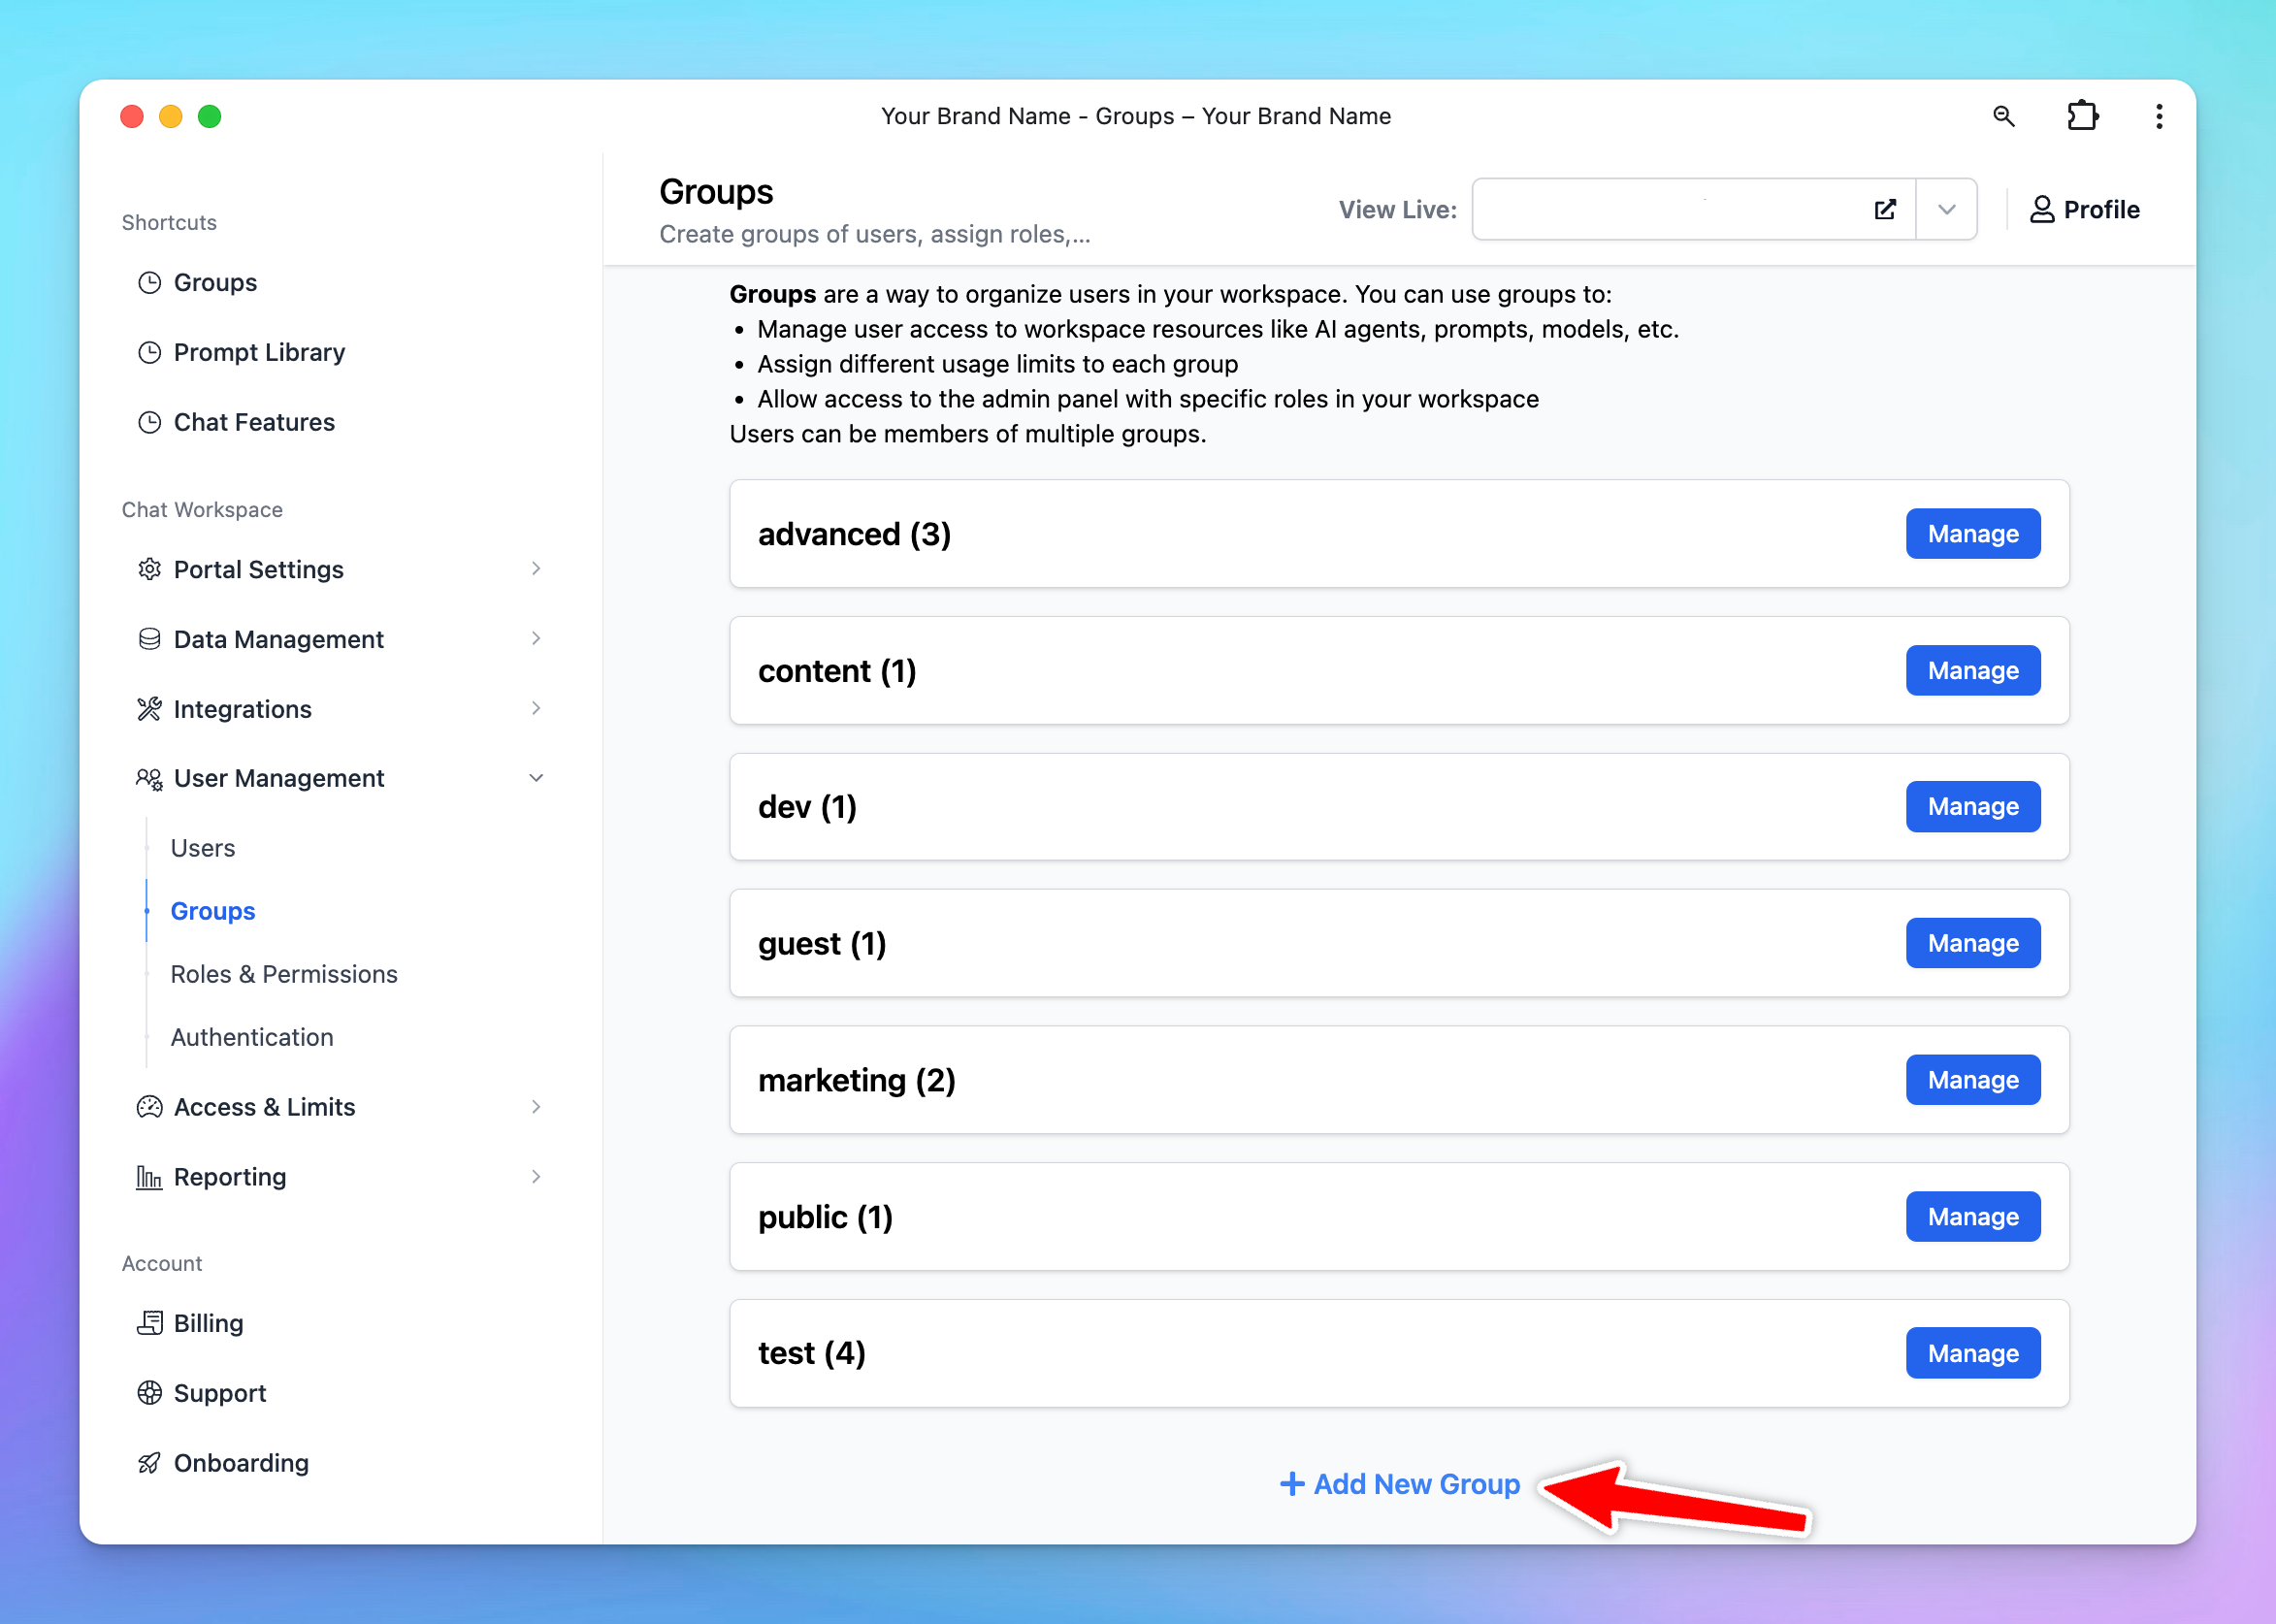
Step 1: Create user groups for your team members
Creating Groups for your team members allows you to categorize them into different groups of users, for example, Private group, Community group, BOD group, etc.
Please follow these steps to create groups for your members:
- Go to the Admin Panel in your workspace.
- Navigate to the Groups section under User Management.
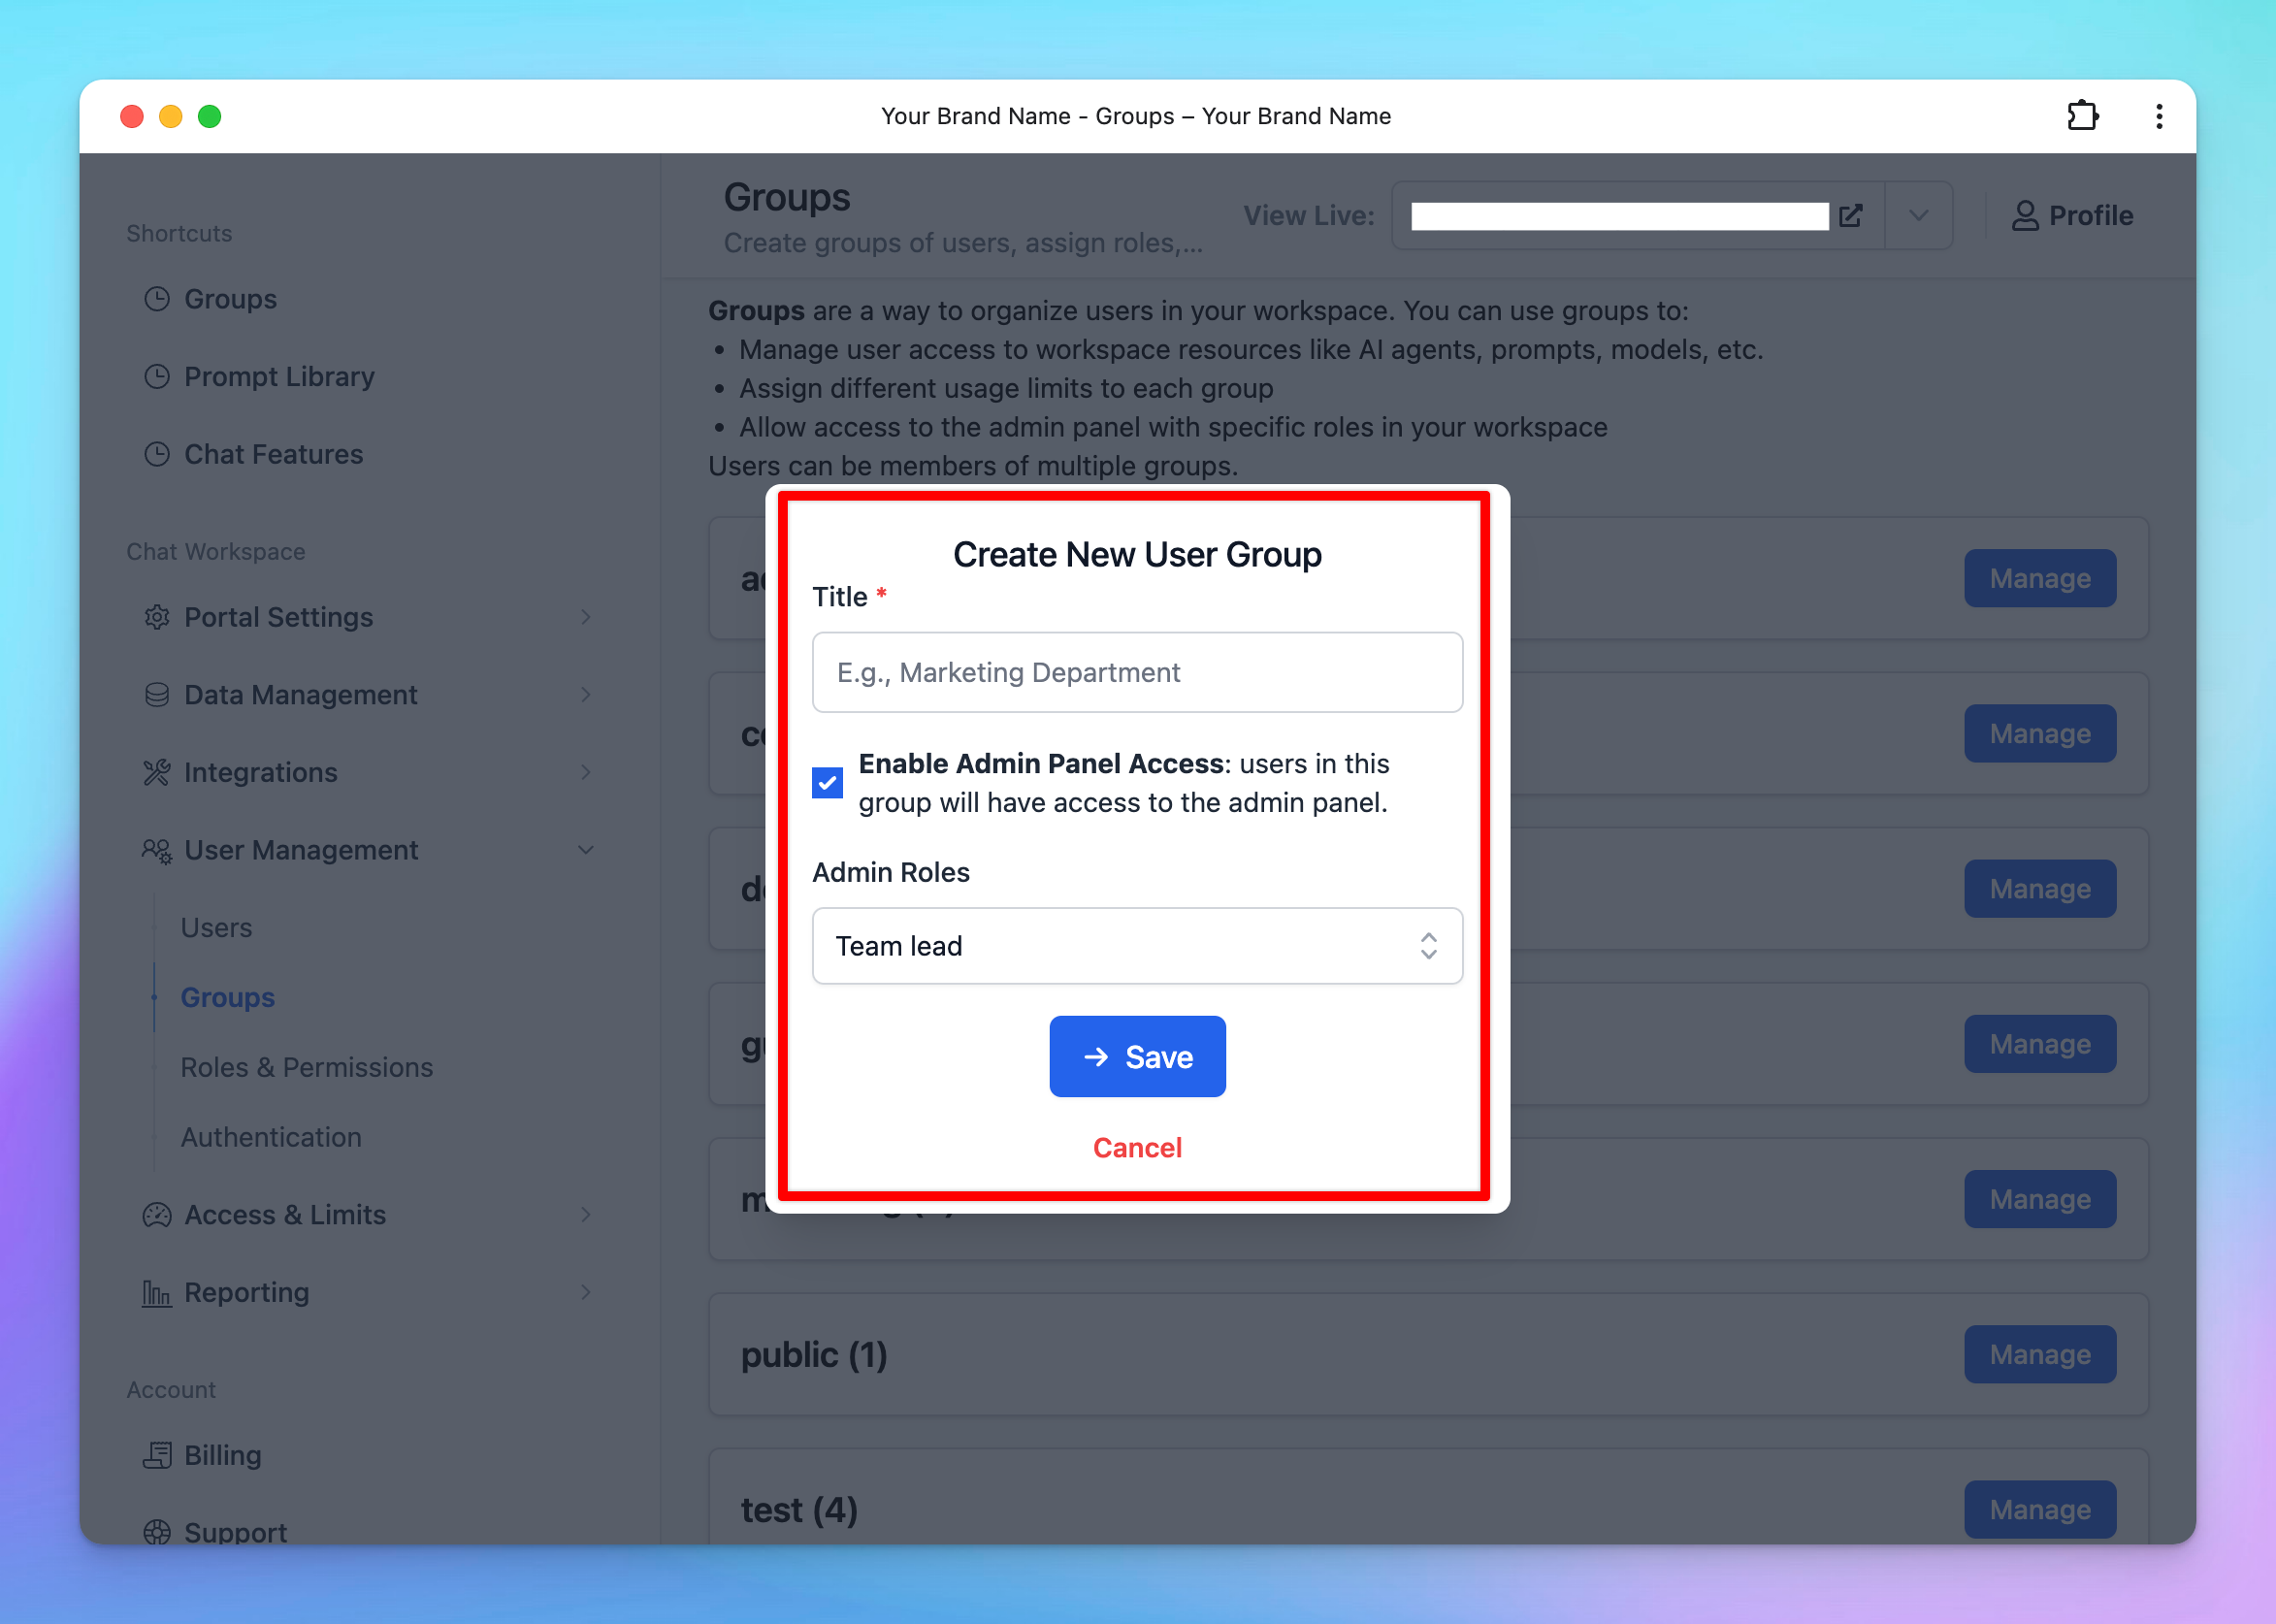
- Click on Add New Group.
- Enter a Group Name that reflects the purpose or role of the group.
- (Optional) Enable Admin Access for this group if they can have access to the admin panel.
- If you enable this option, ensure you assign appropriate Admin Roles to the group. These roles should align with the permissions you’ve defined in the Roles and Permissions settings.
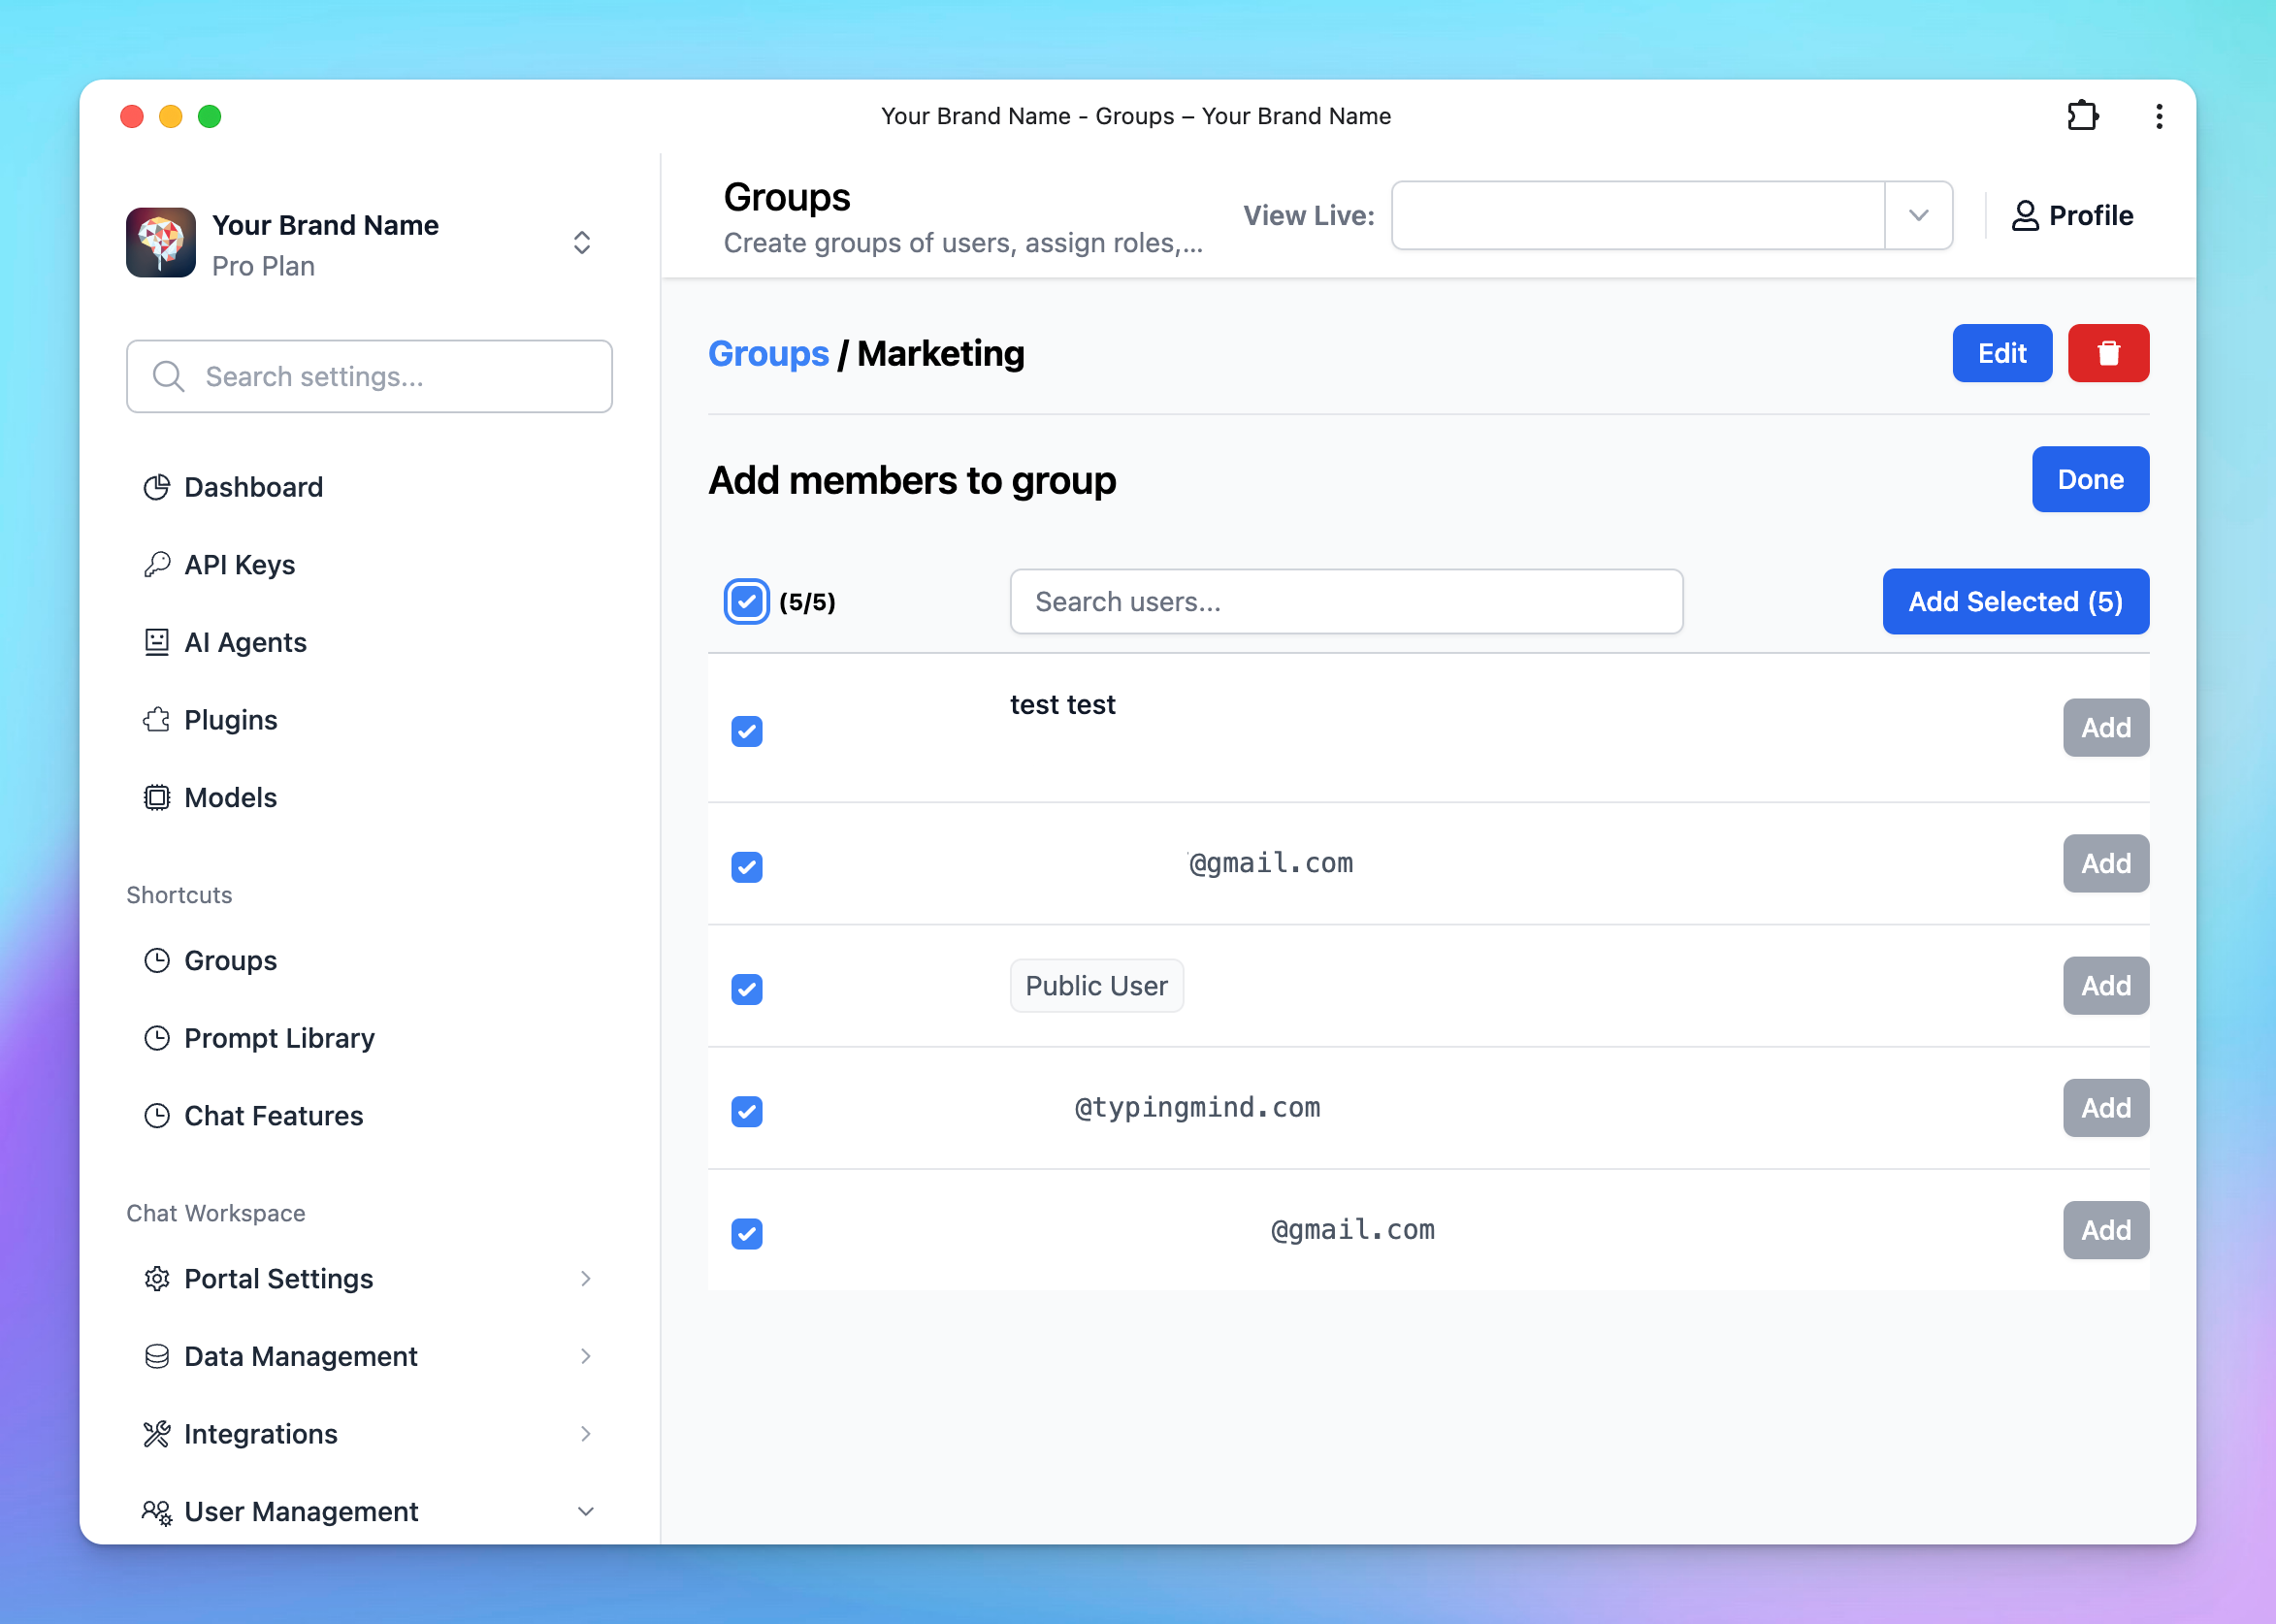
- Click Manage next to the created group
- Click Add Members
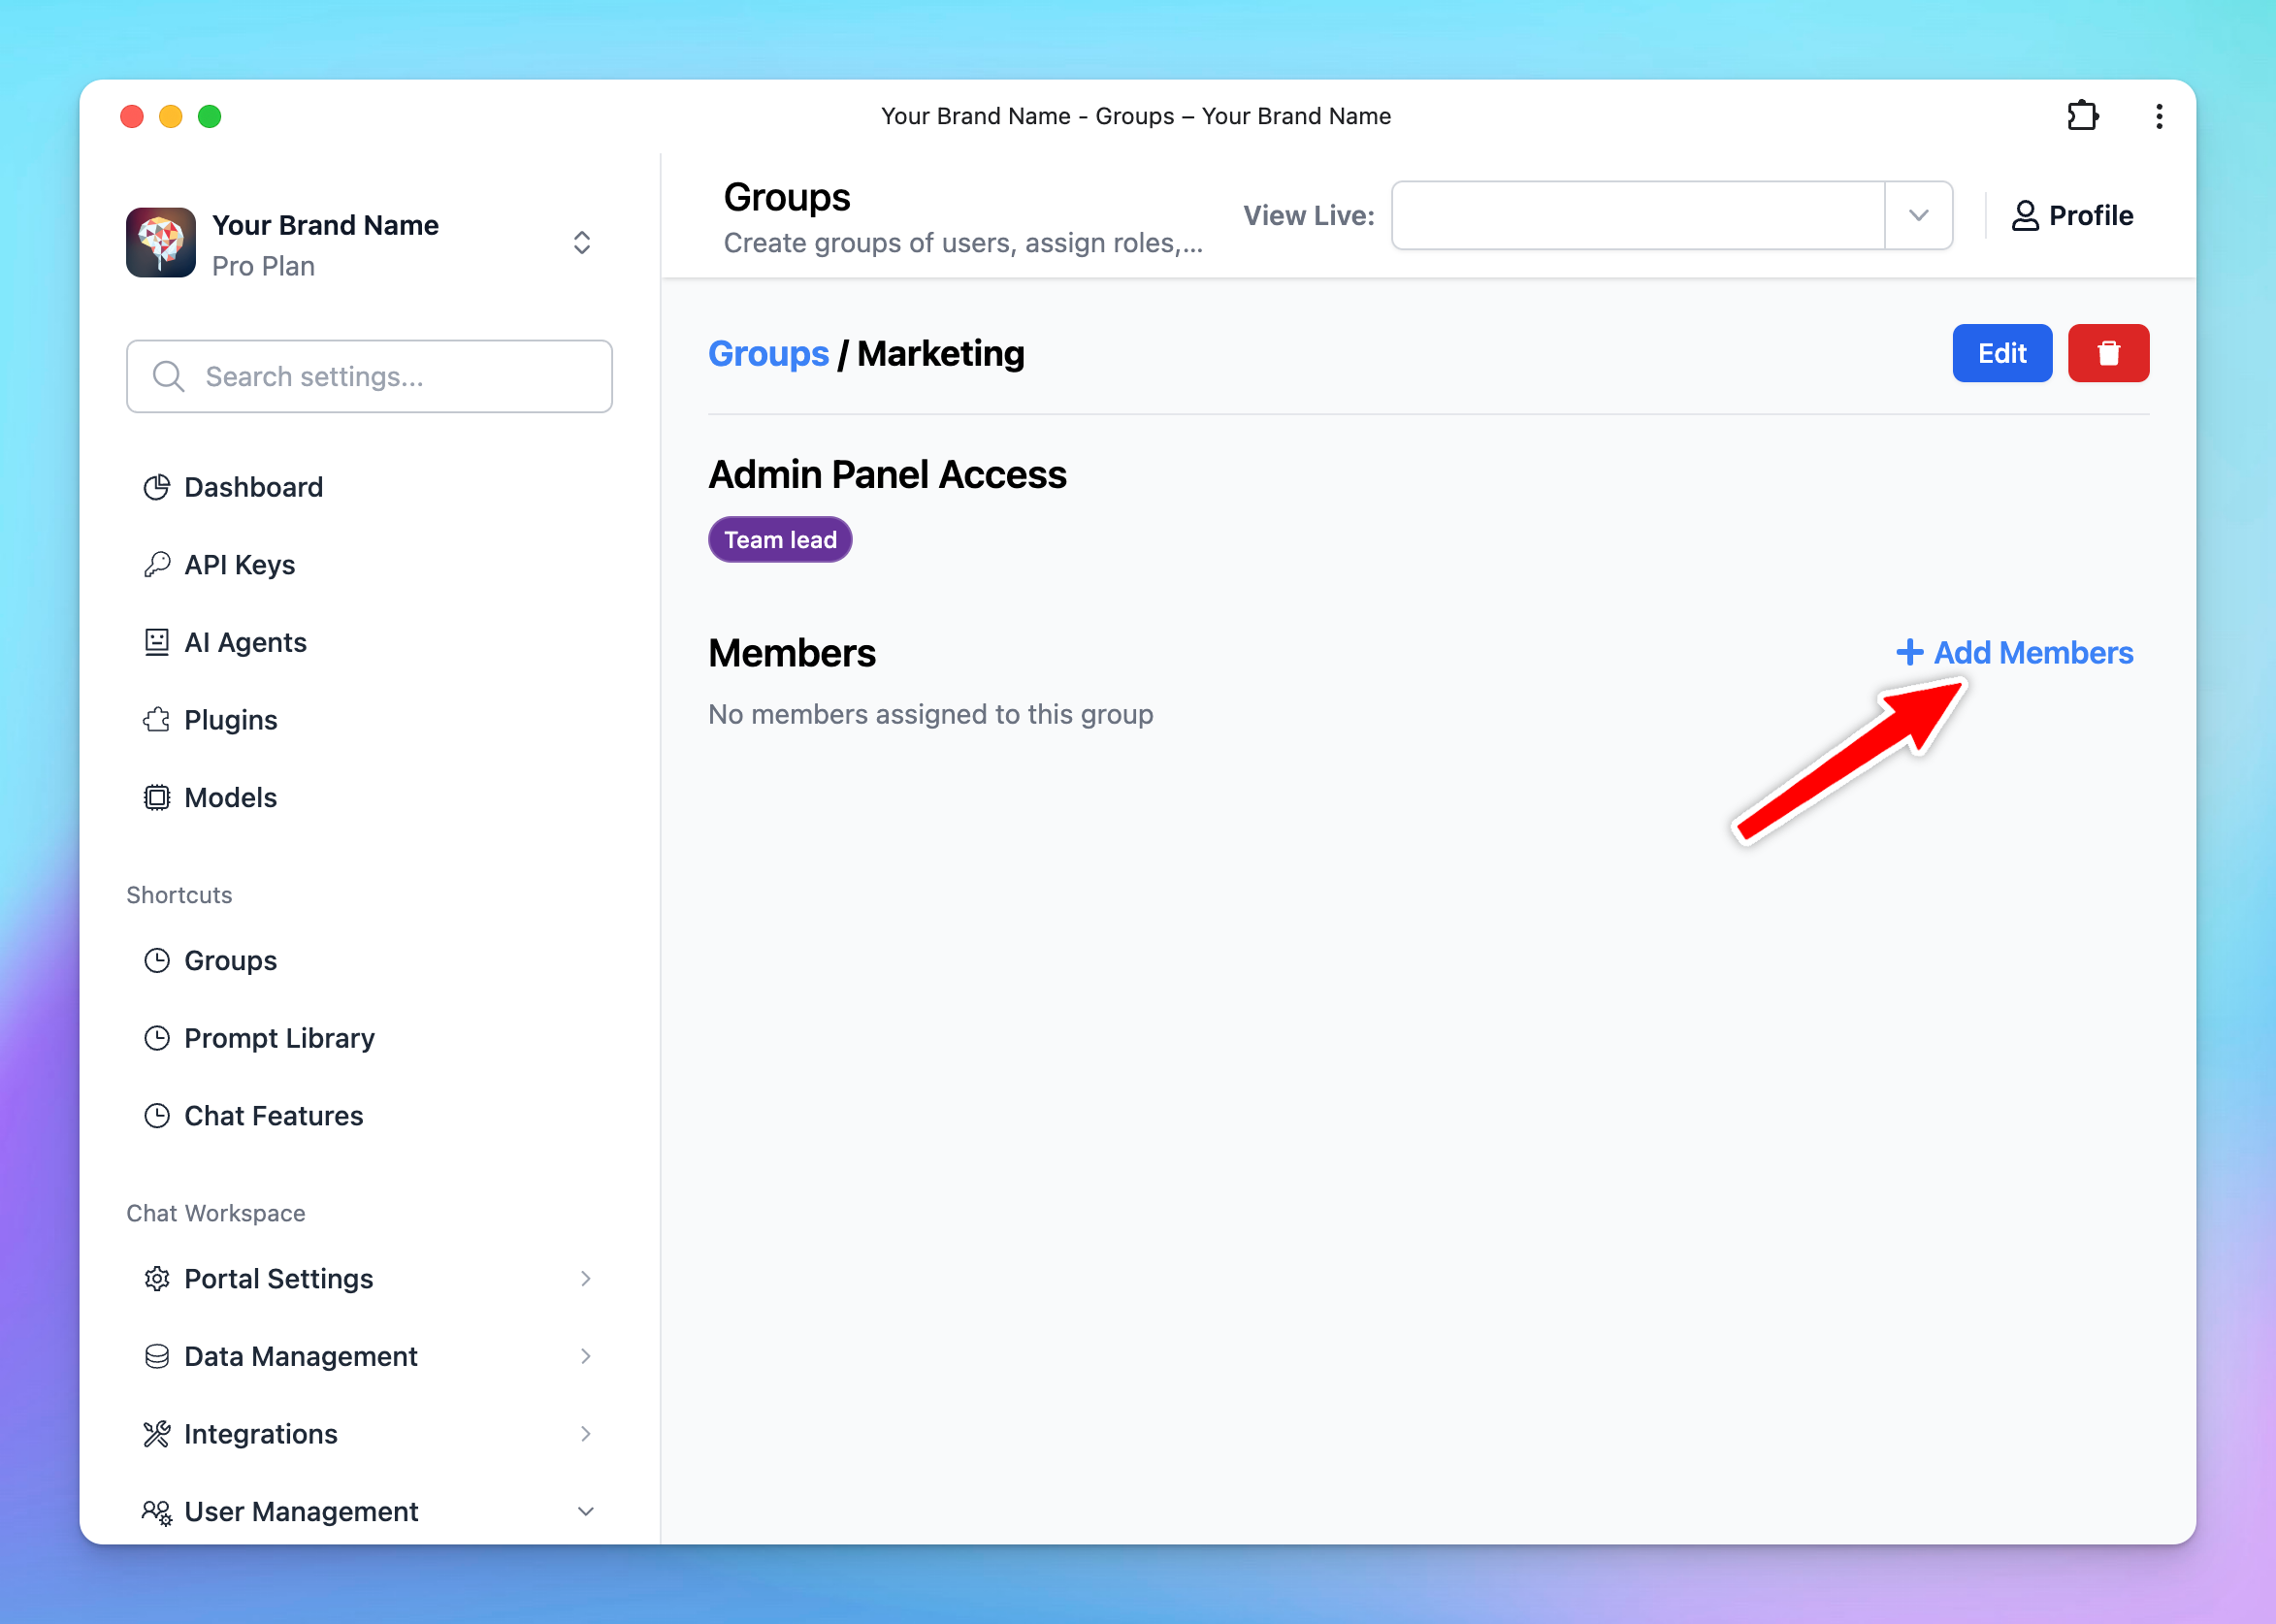
- Select the users you want to include in this group from the list.
Learn more on User Groups
Step 2: Assign User Groups to Prompts
You can control the prompt visibility to specific user groups as follows:
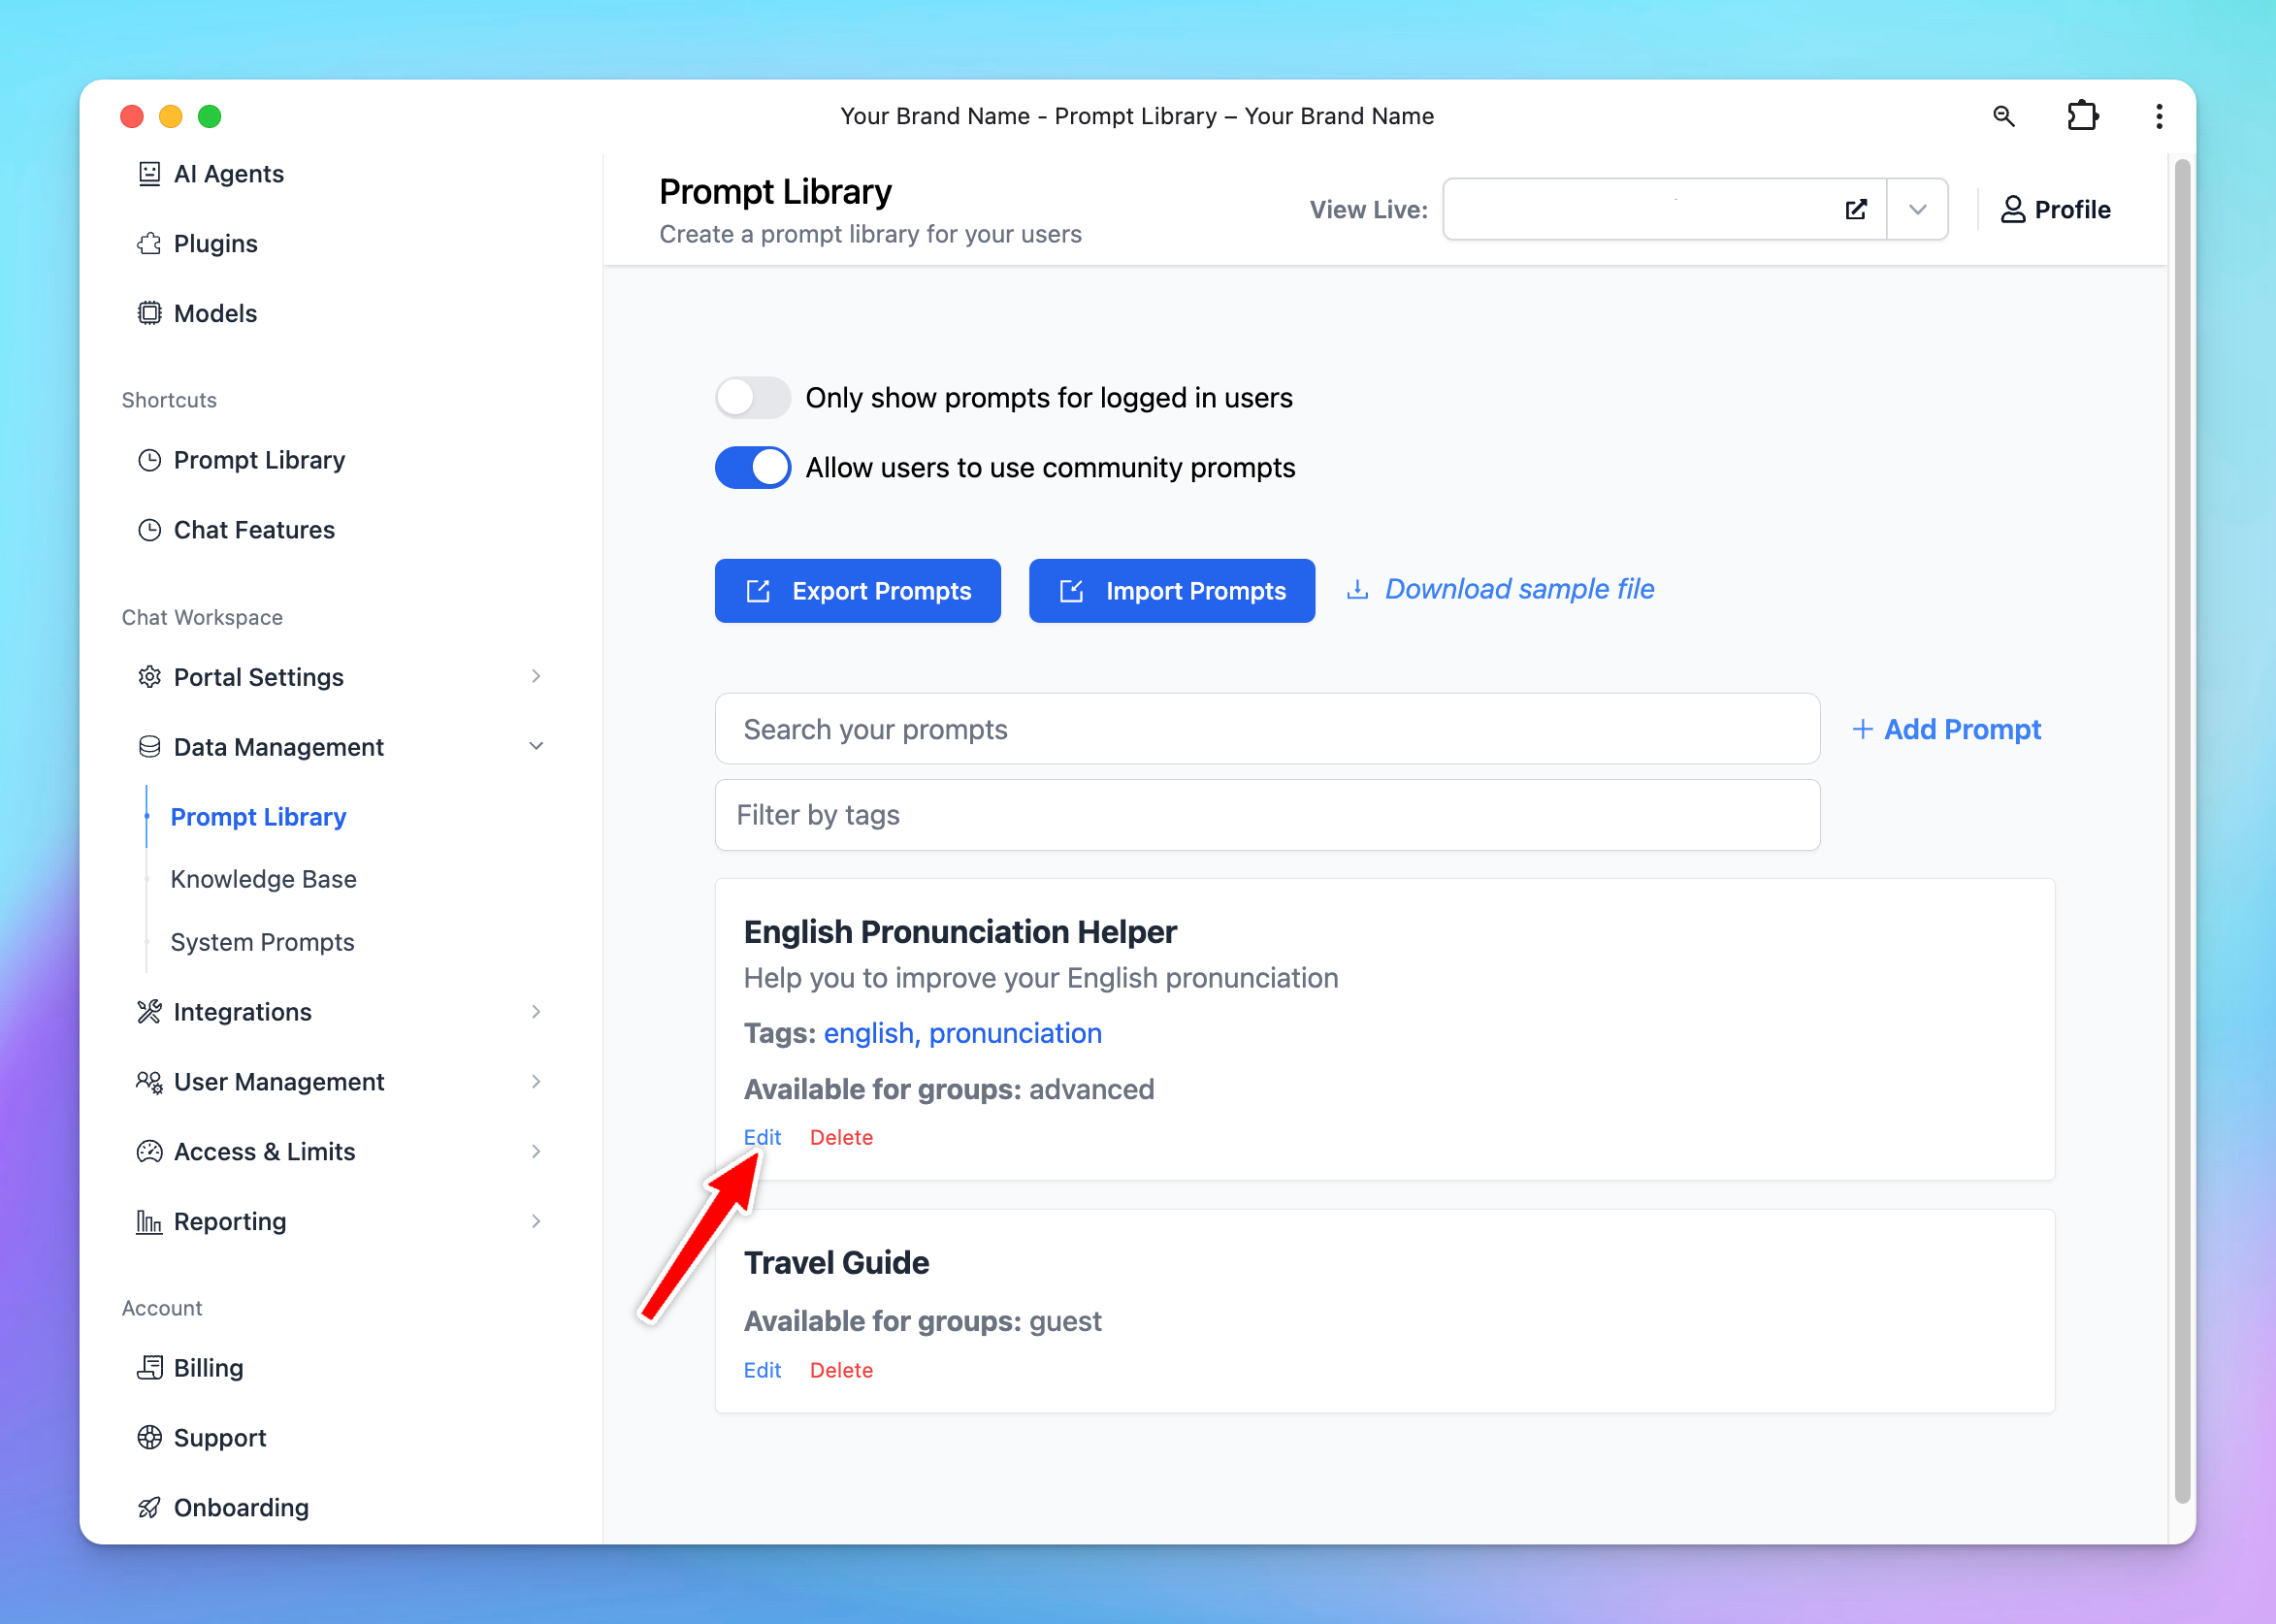
- Go to the “Prompts Library” section from the Admin Dashboard.
- Select “Add Prompt” to create a new prompt, or “Edit” an existing prompt.
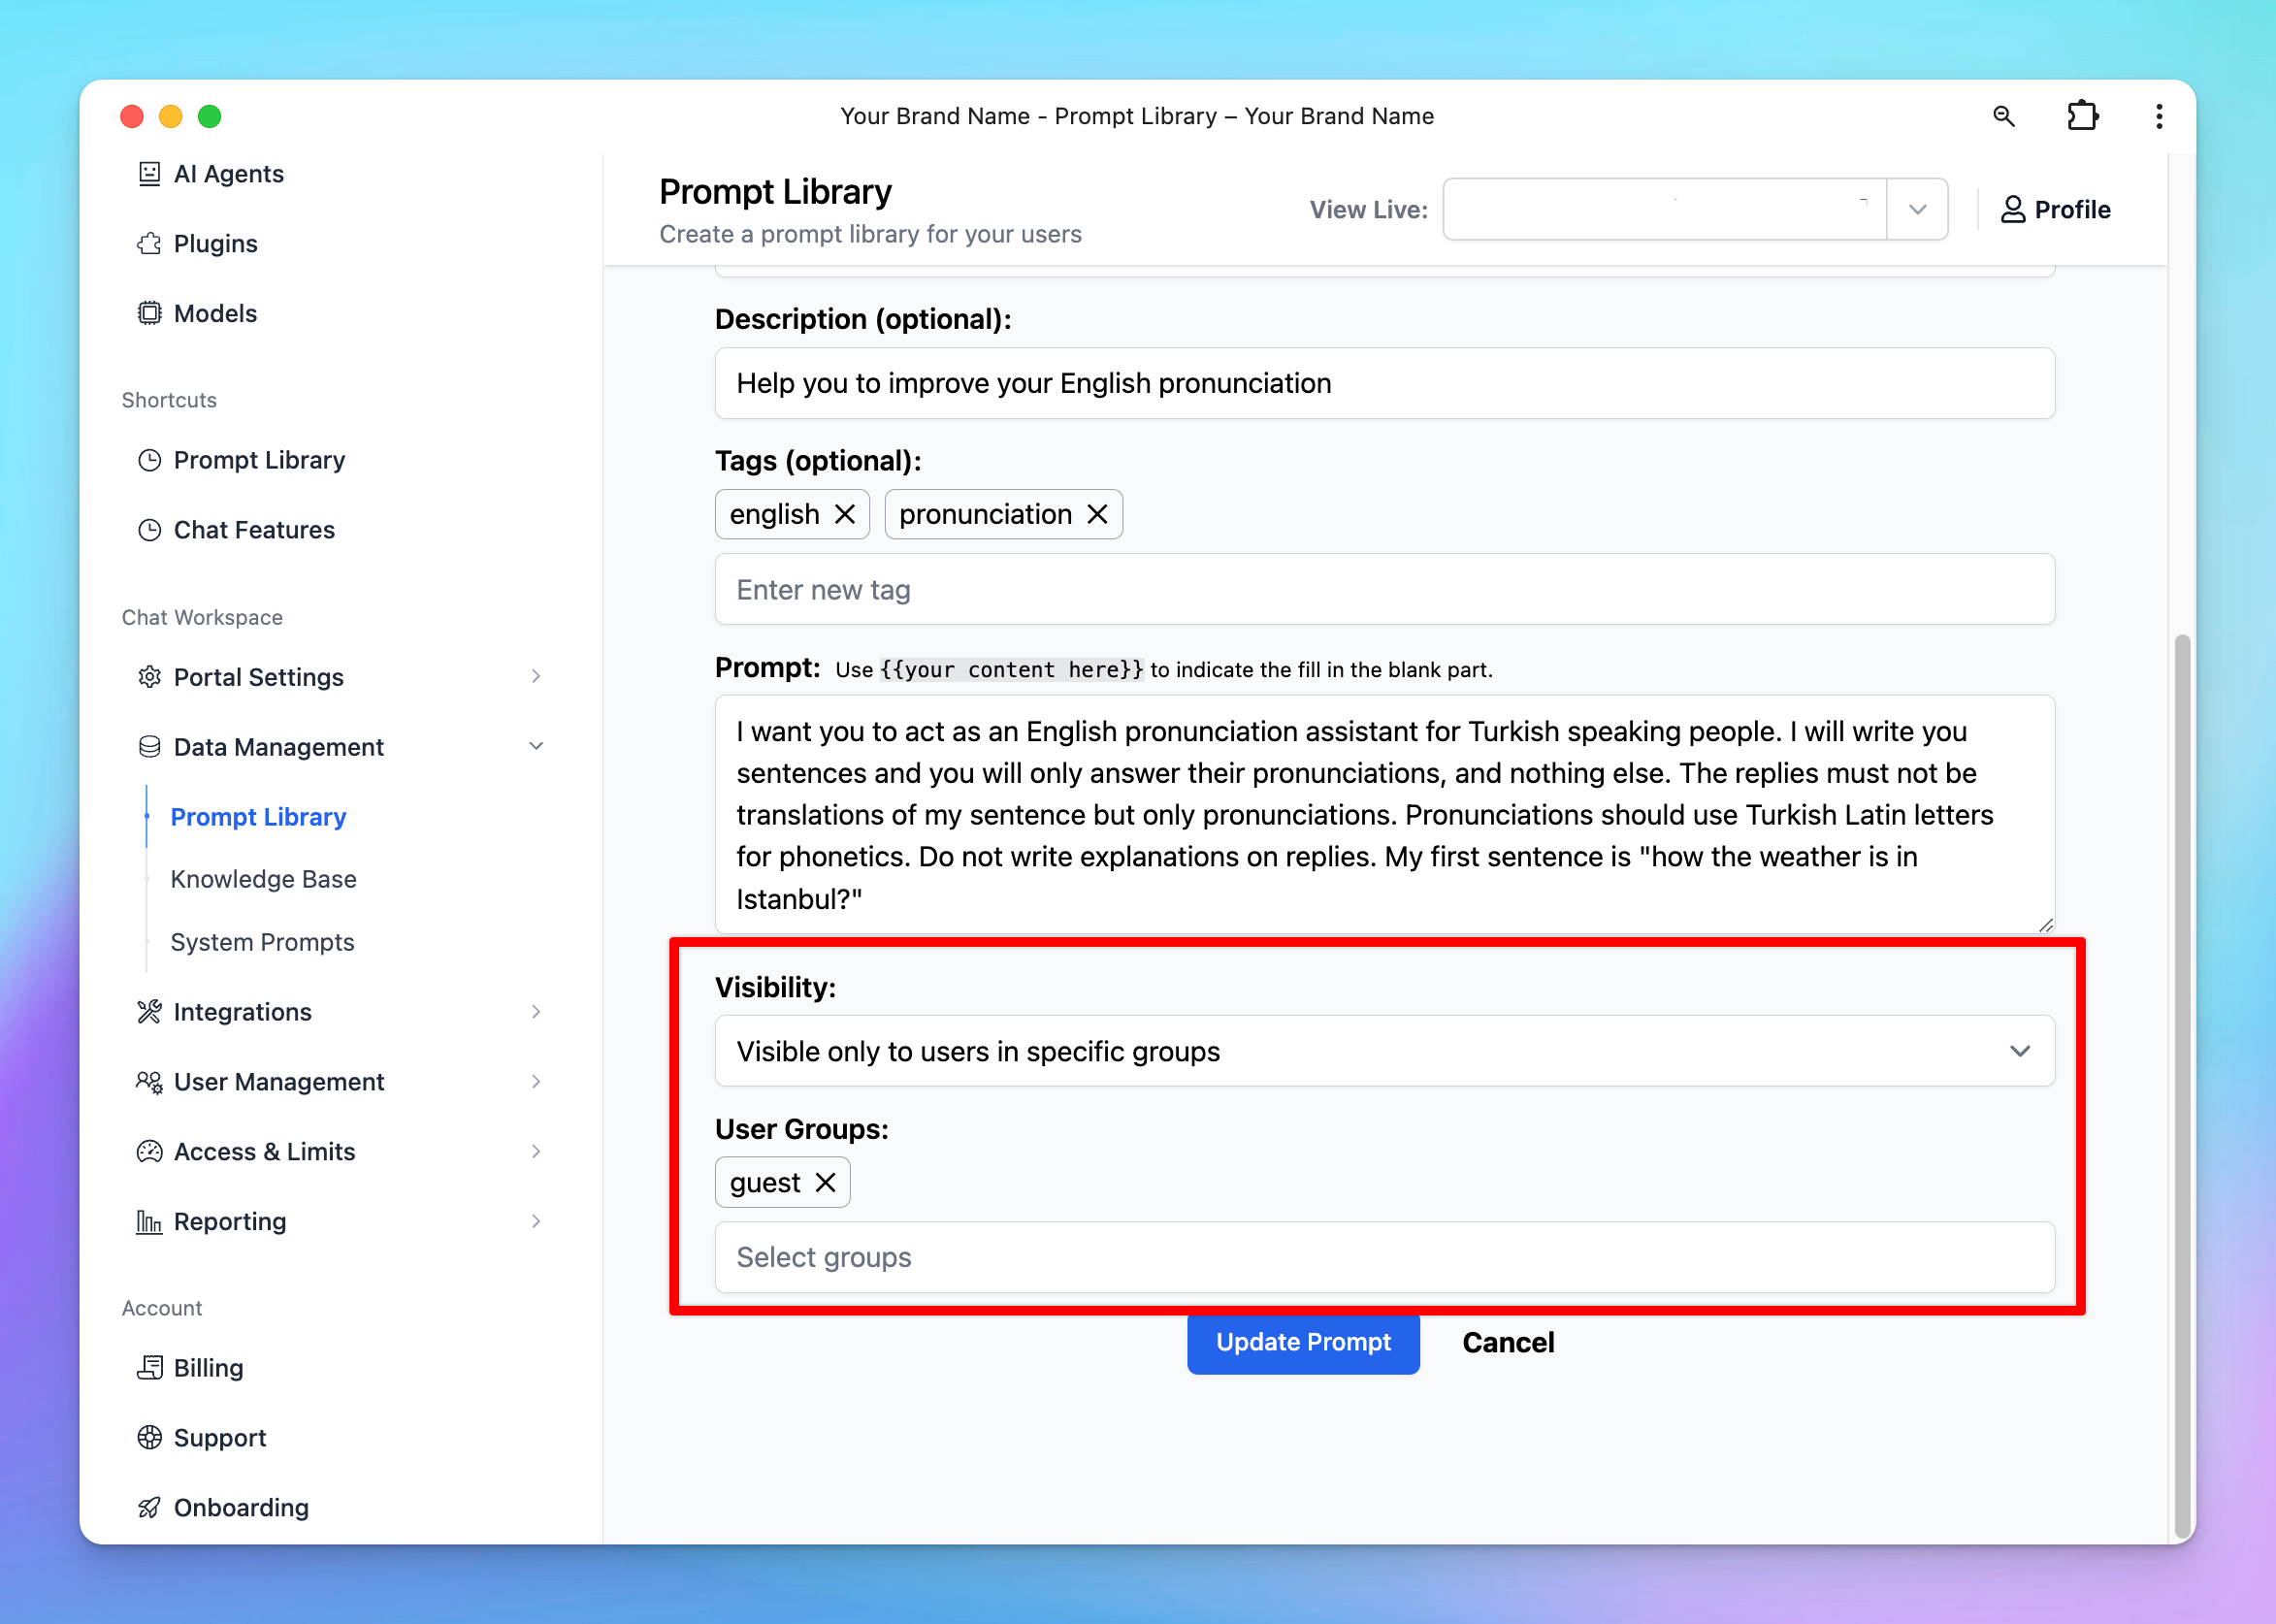
- Scroll down to the “Visibility” section and select from the drop-down menu:
- “Visible only to users in specific groups”: once you add groups, users in these certain groups are allowed to use the model
- or “Visible to all users except users from specific groups”: once you add groups, users in these certain groups ARE NOT allowed to use the model.
Example:
If you want only members in the “Guest” group to access the “Content Improver” prompt, assign the “Guest” group to that prompt. Members in other groups will not have access.
Note
You can also restrict users access to certain AI Agents and certain chat models.