Features
Embed Chat Widget
Embedding a chat widget to your website

One effective way to boost engagement and provide immediate value to your visitors is by embedding a chat widget on your website. Not only does this offer an interactive element to your site, but it also provides a hub for instant communication and assistance.
Here are 4 easy steps to do that:
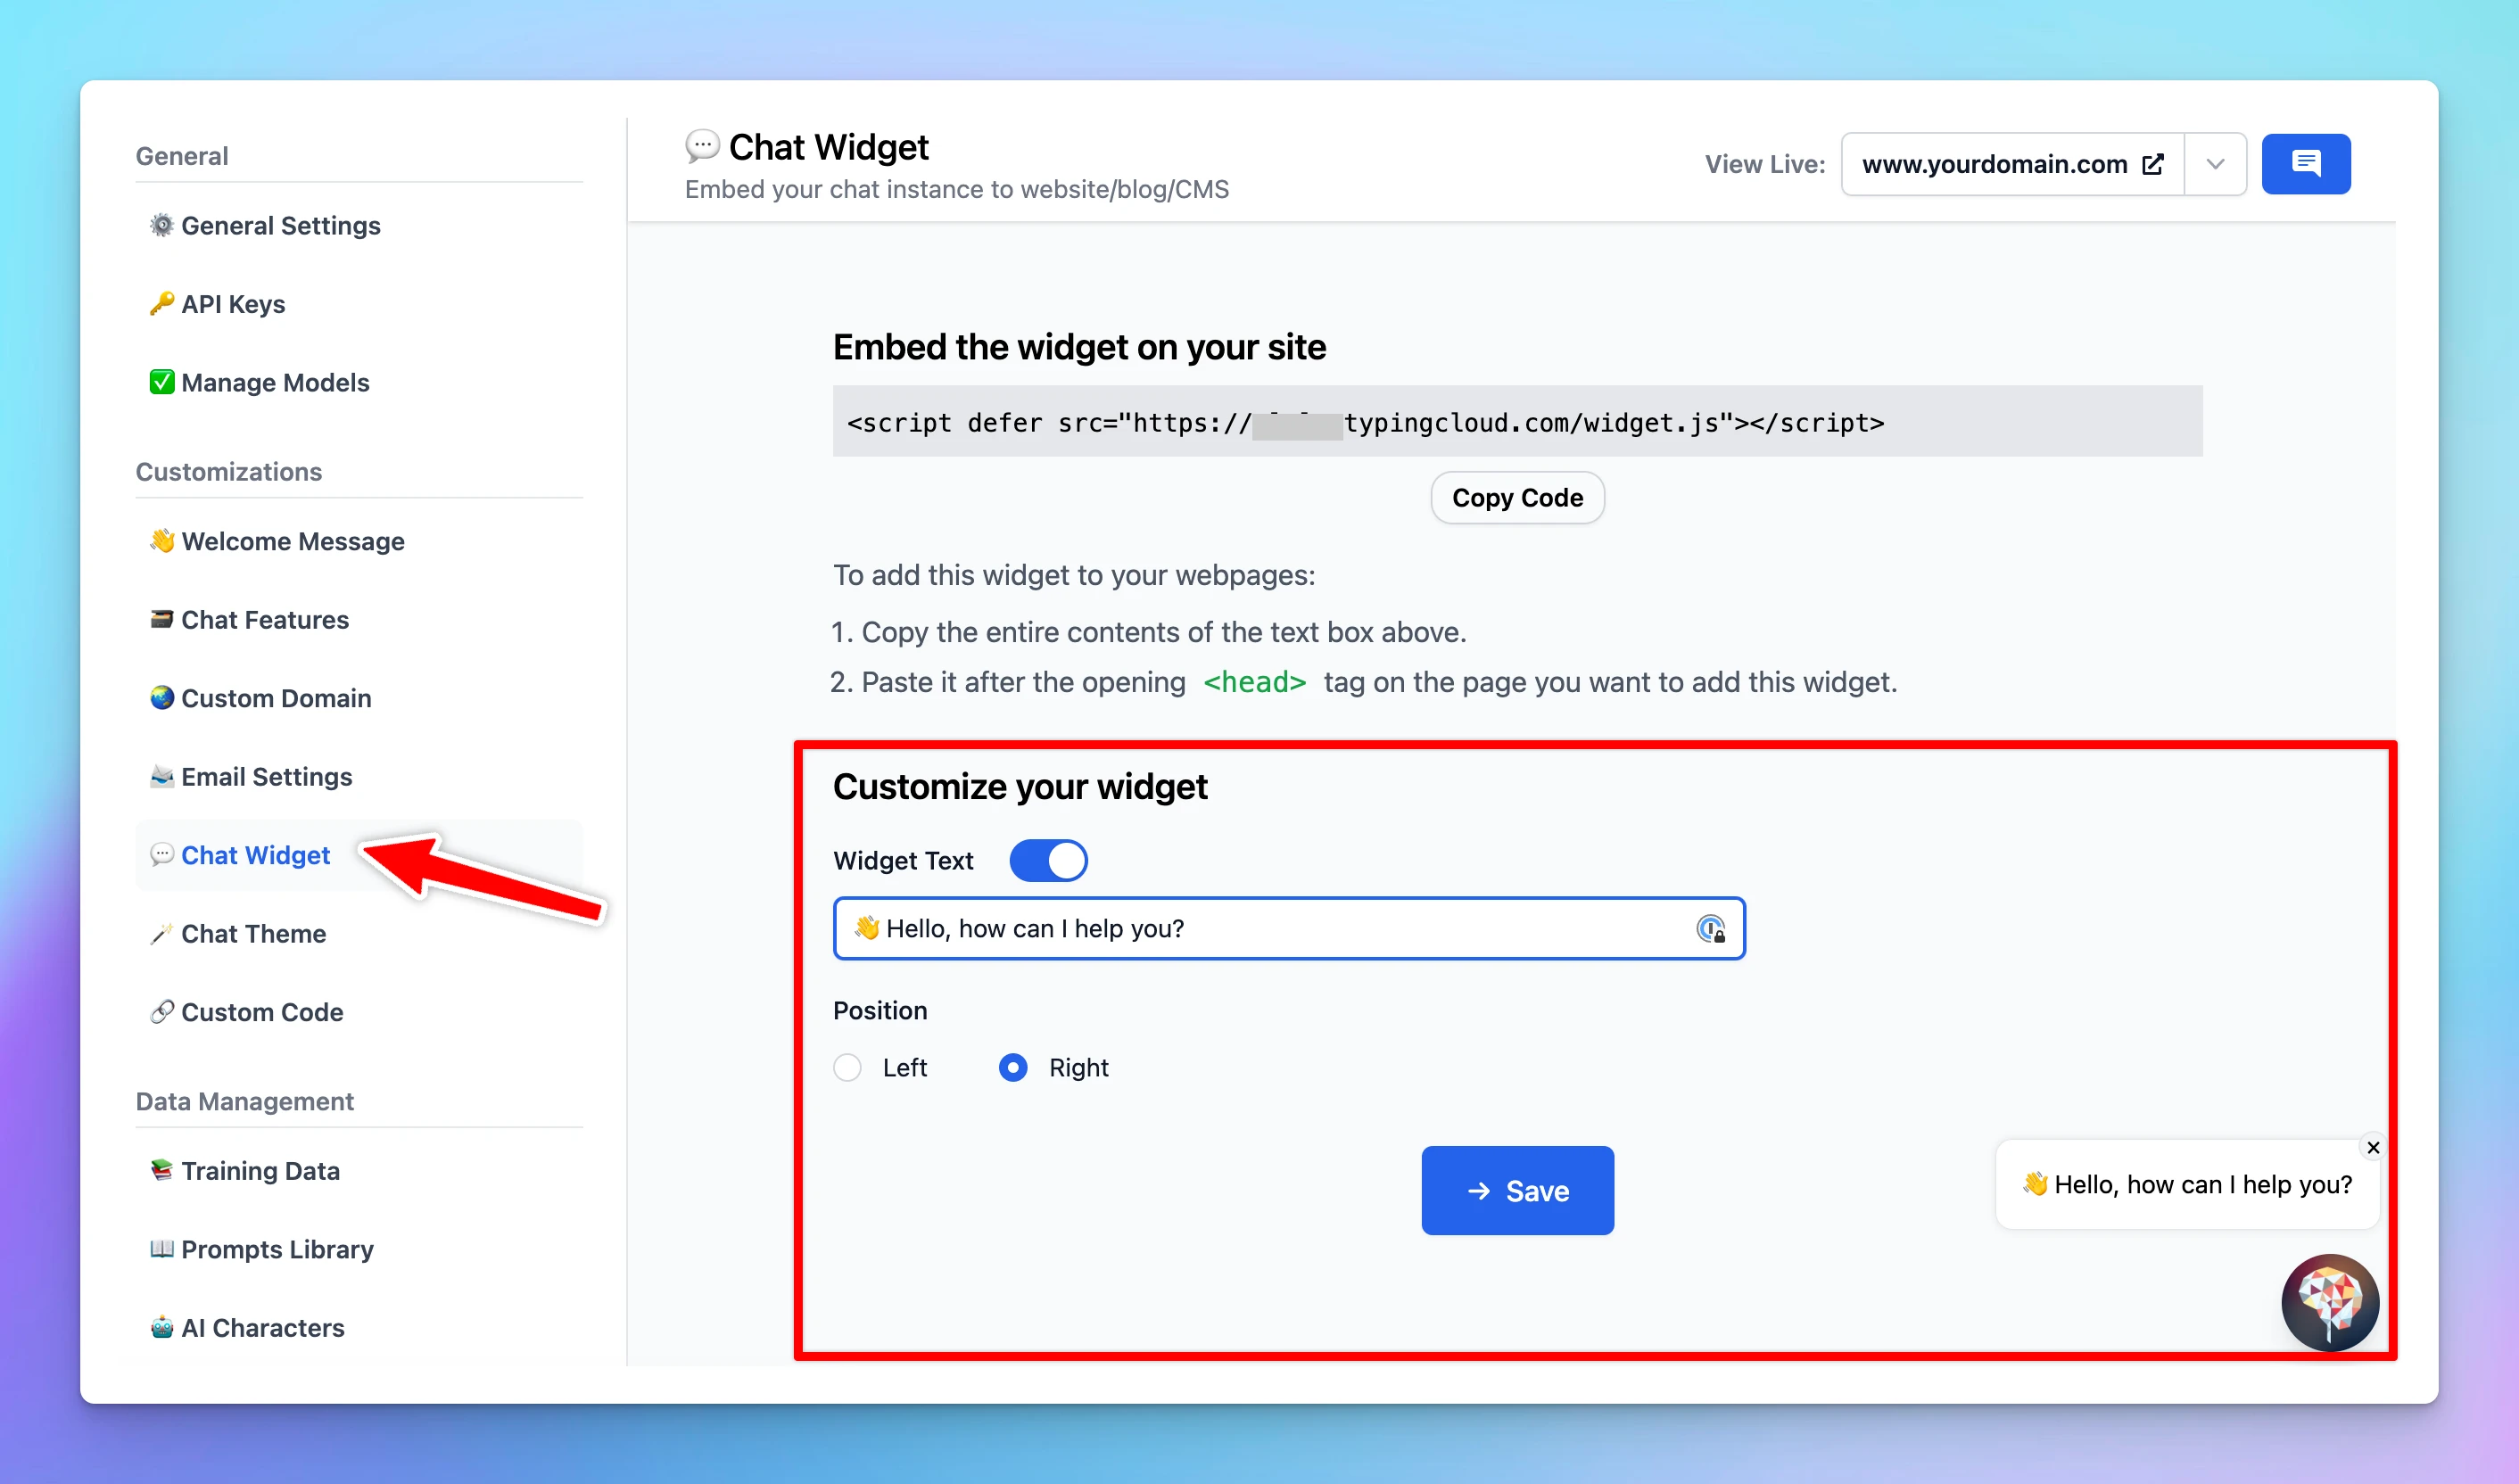
Step 1: Customize Your Chat Widget
- Log into your chat instance's Admin Panel.
- Navigate to the 'Chat Widget' section.
- Find the ‘Customize your widget’ section to adjust the Welcome messages and the widget position

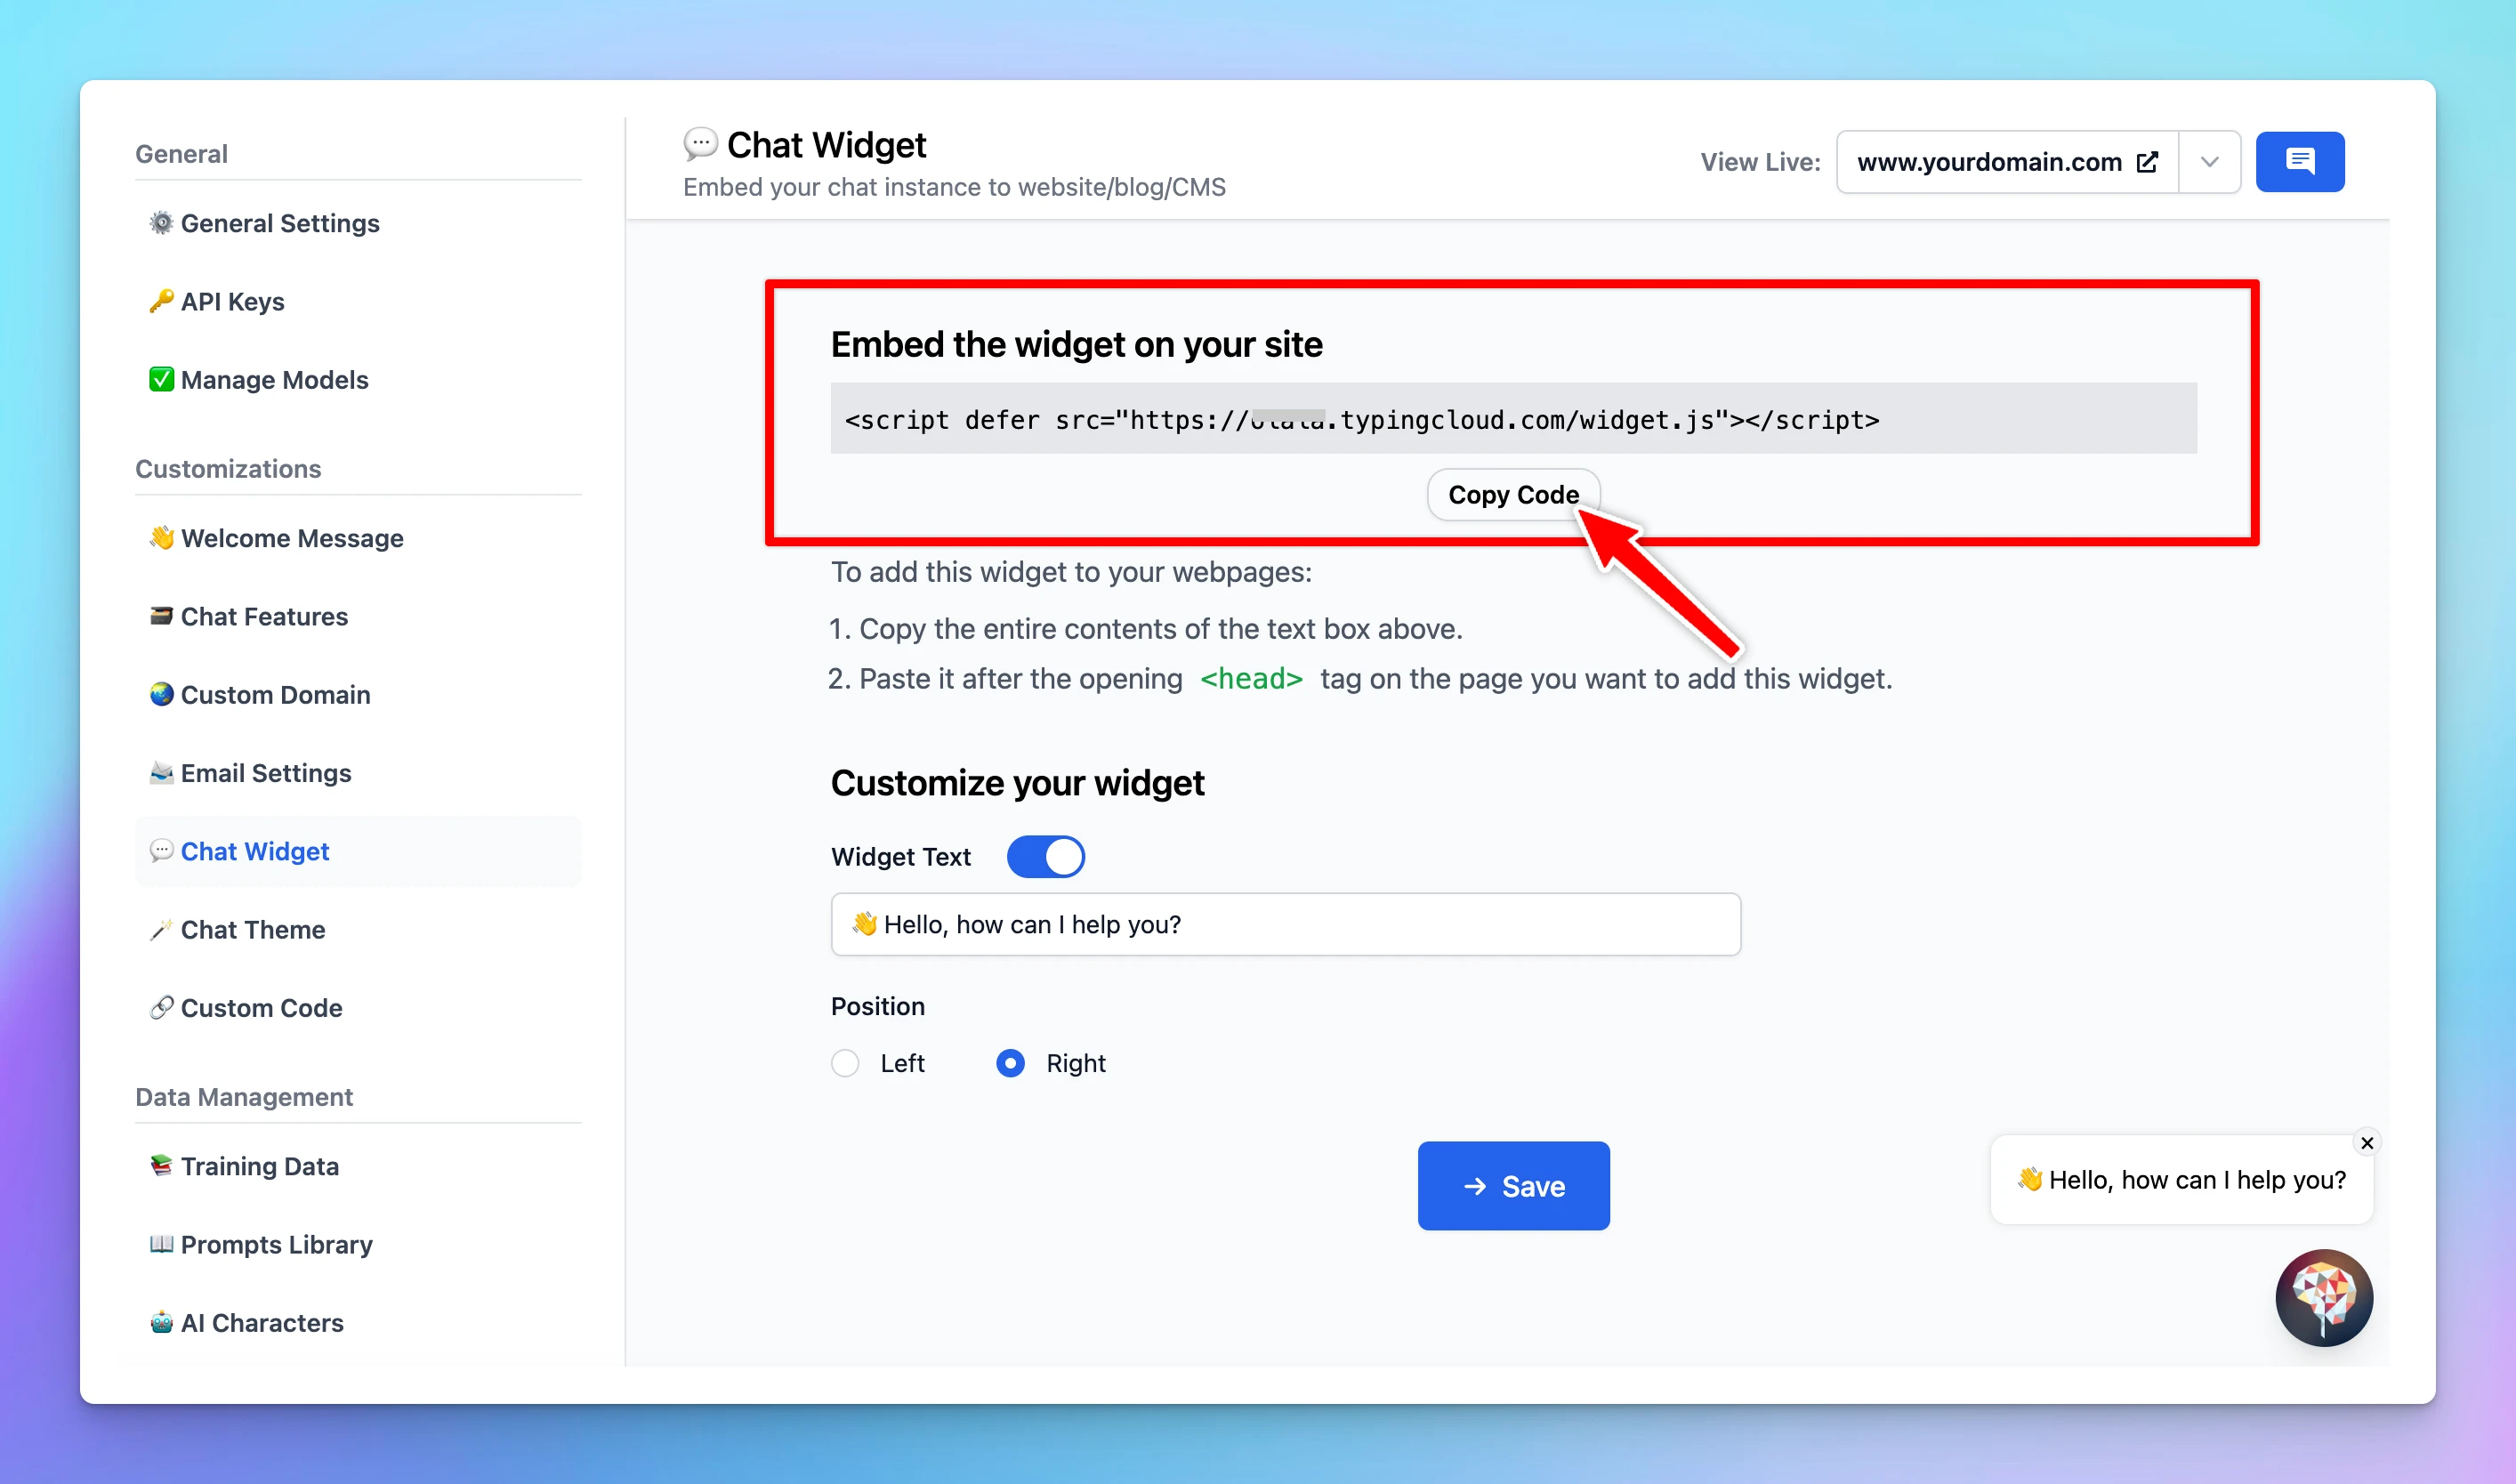
Step 2: Copy the Embed Code
Click on the 'Copy Code’ button

Step 3: Embed the Code into Your Website
Paste the code after the opening <head> tag on the page you want to add this widget.

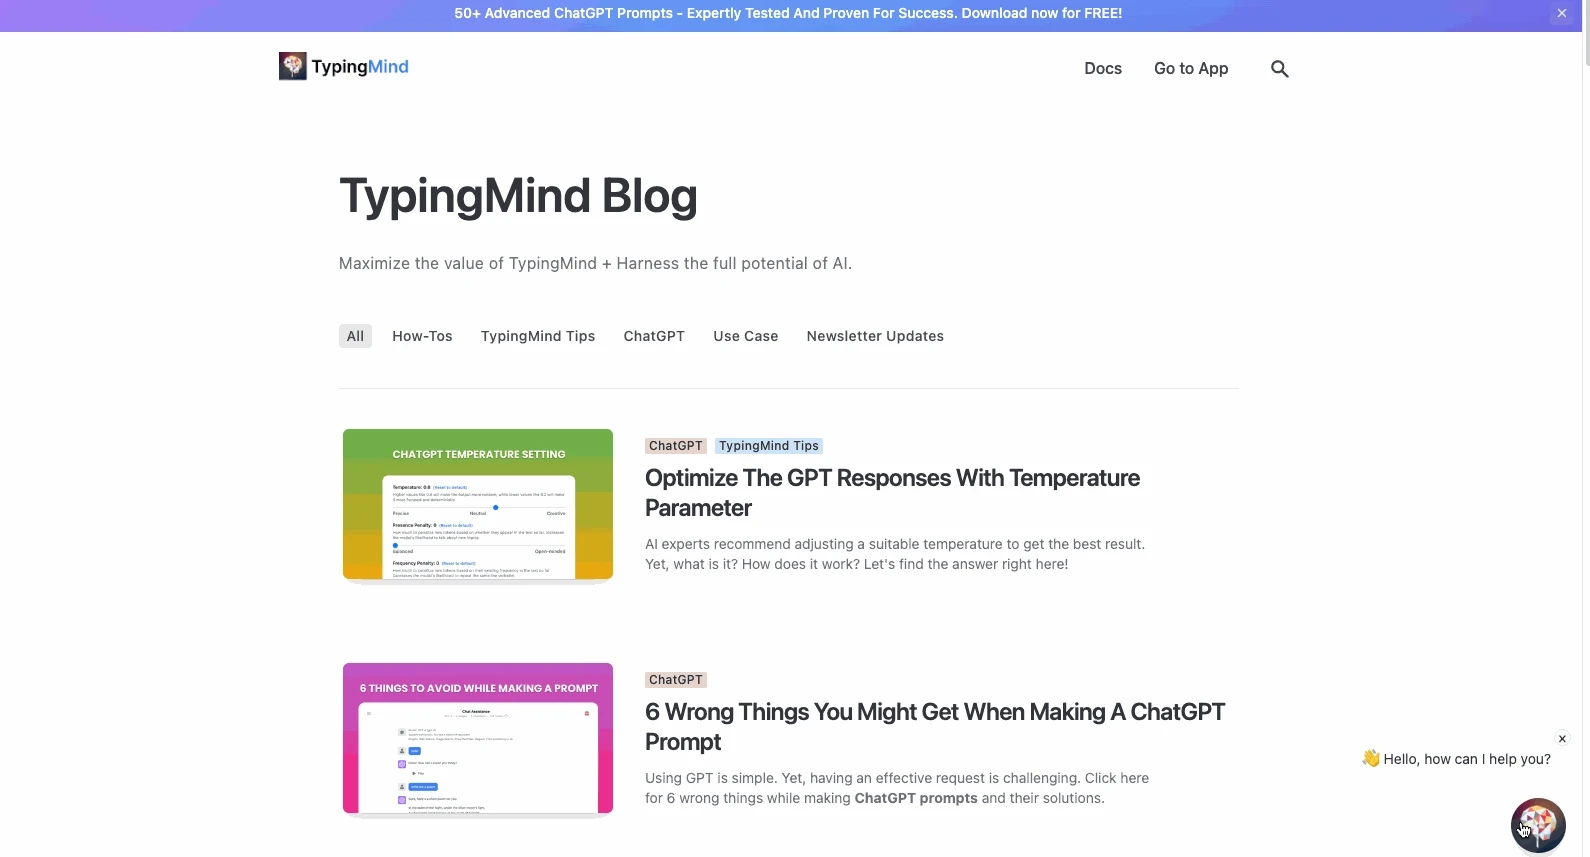
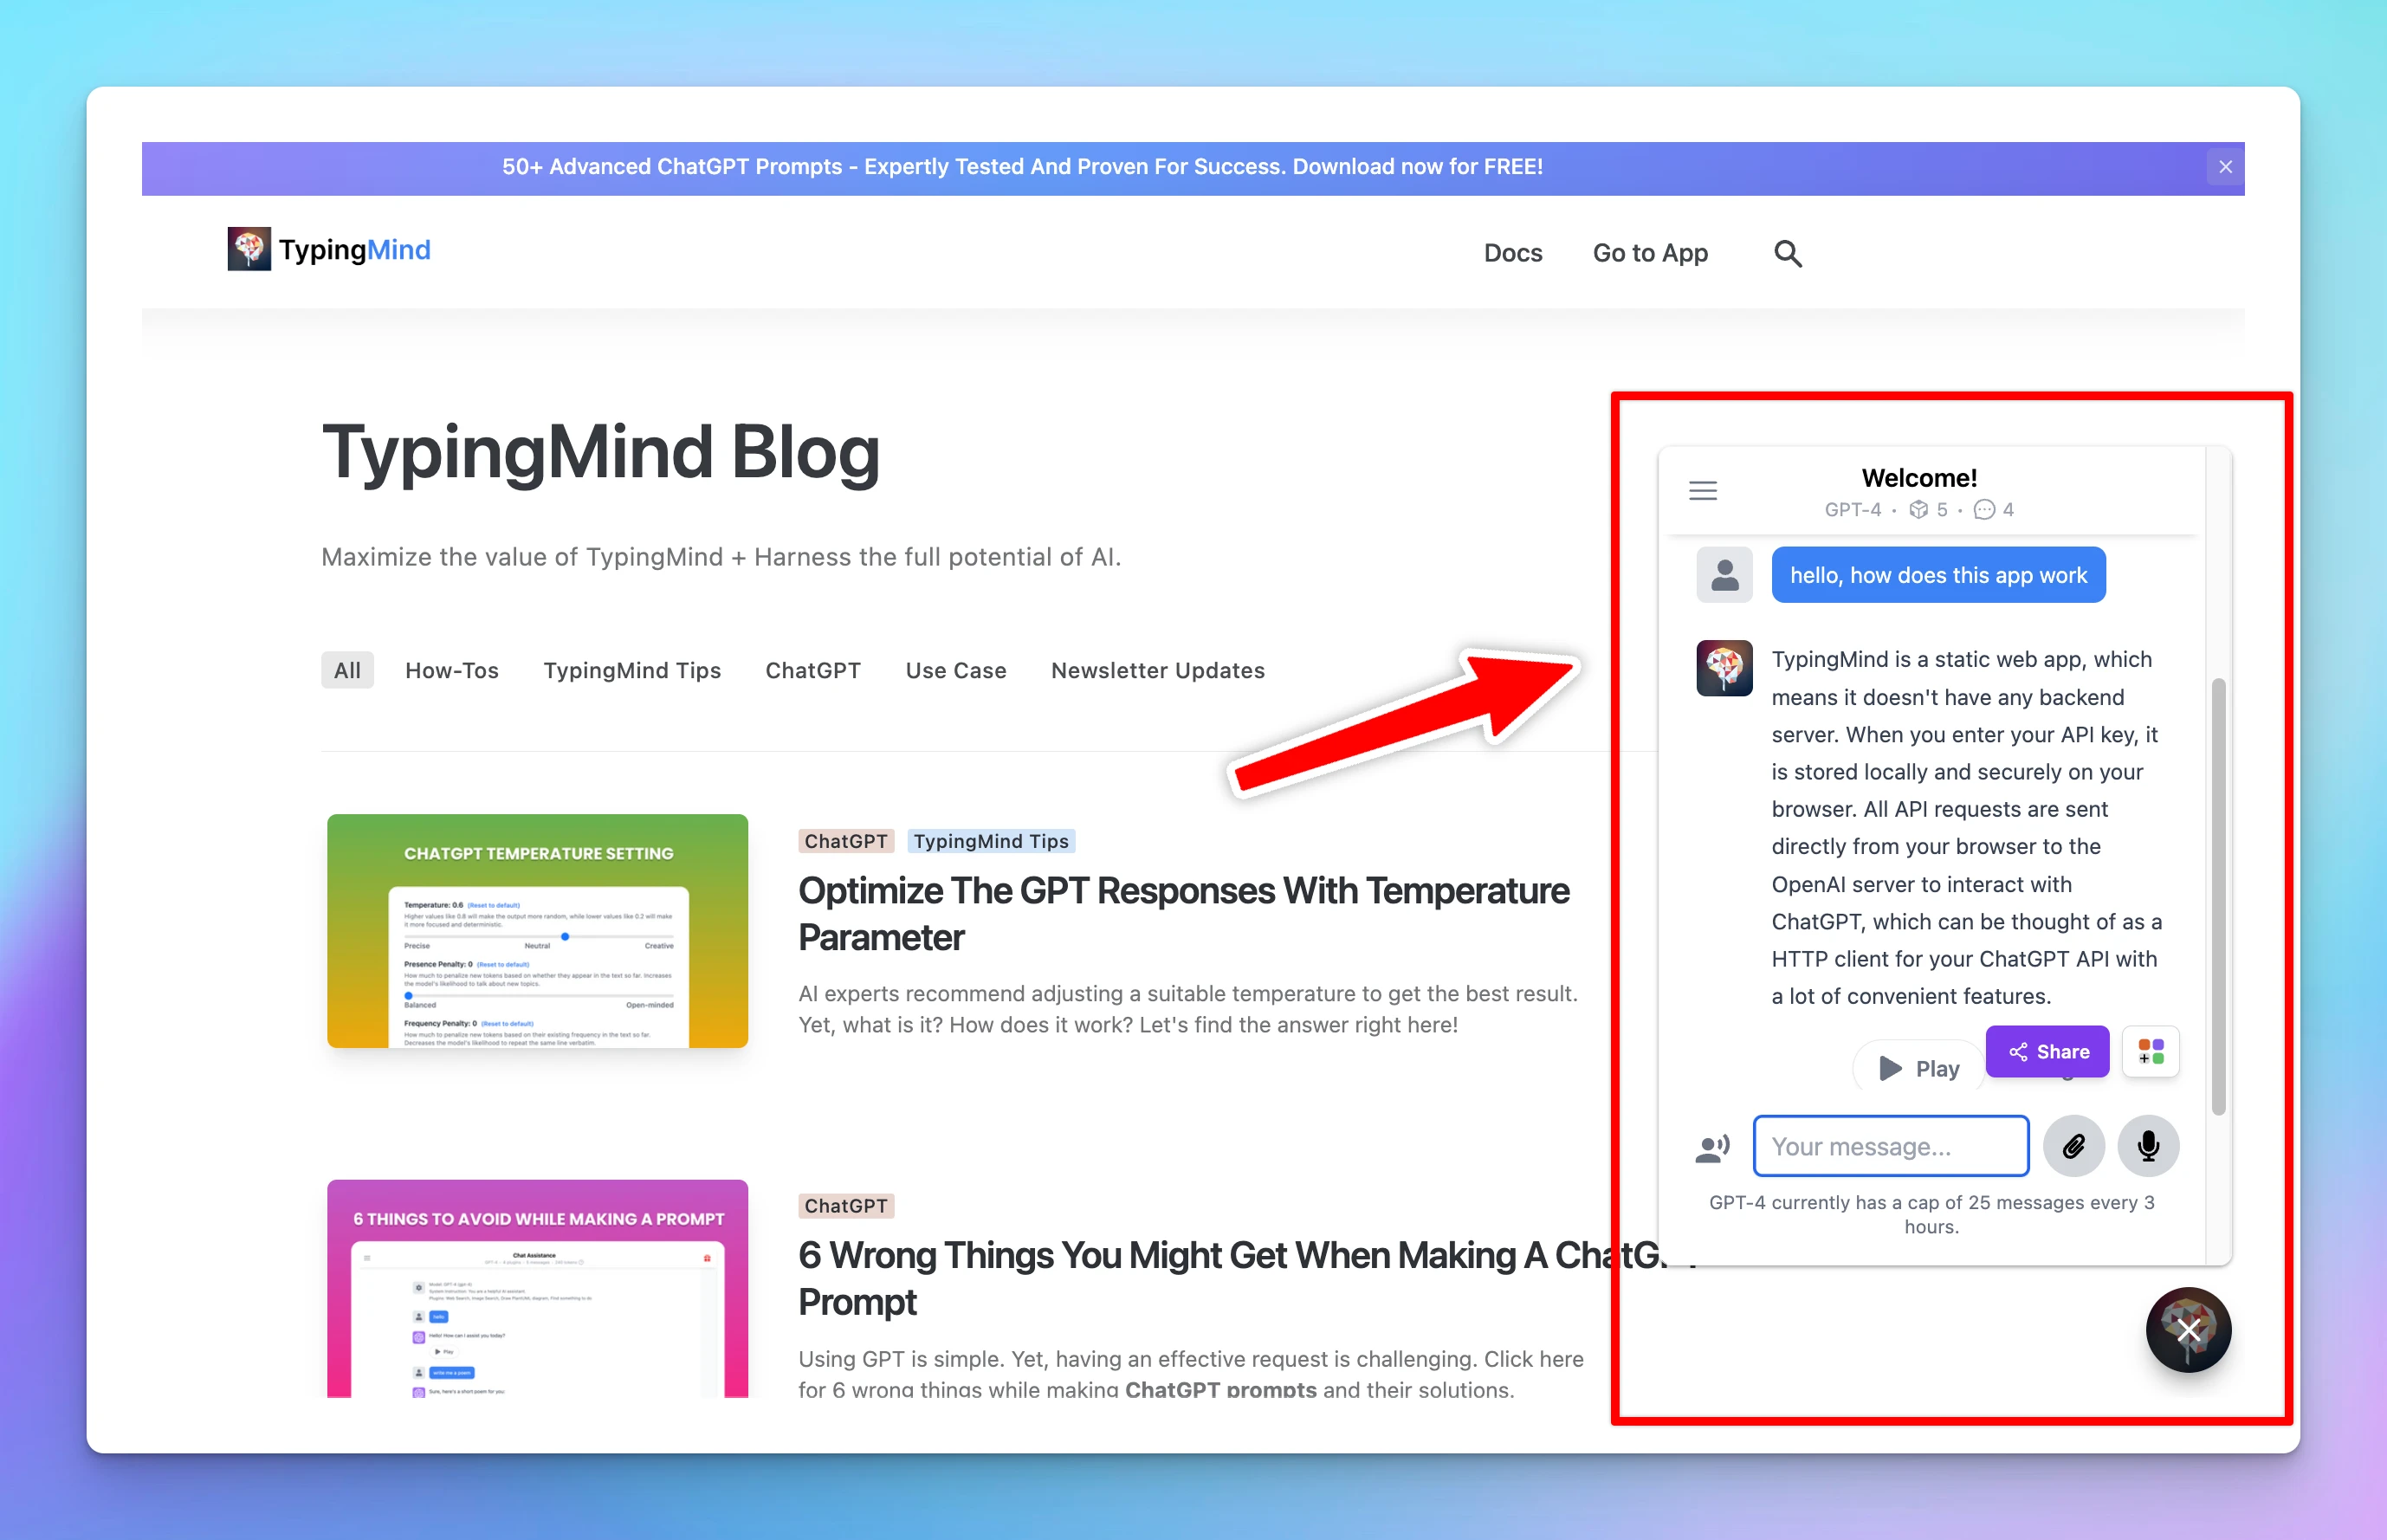
Step 4: Test the Chat Widget
- Navigate to your website where the chat widget has been embedded.
- Interact with the chat widget to ensure it is functioning as expected.

Best Practices
- Control the chat features: you can hide some of elements / features on the chat interface. This can help eliminate potential distractions and guide users to interact with the chat UI in the way you intend. Example: hide prompt and AI agents library.
- Choose the right access mode: decide who should have access to your chat widget. If your widget is meant for customer support, you might want to make it publicly accessible to all visitors. However, if it's intended for exclusive offers, limiting access to users who provide their email might be more appropriate.
- Test the chat widget and update your training data: regular testing allows you to spot any issues and fix them promptly. Moreover, updating your training data frequently ensures that the chat widget continues to improve and adapt to your users' needs, providing them with accurate and relevant responses.
Bring AI to your team today!
Join 18K+ professionals and teams to harness AI's power for your business
Free trial•Get your own AI workspace in minutes


